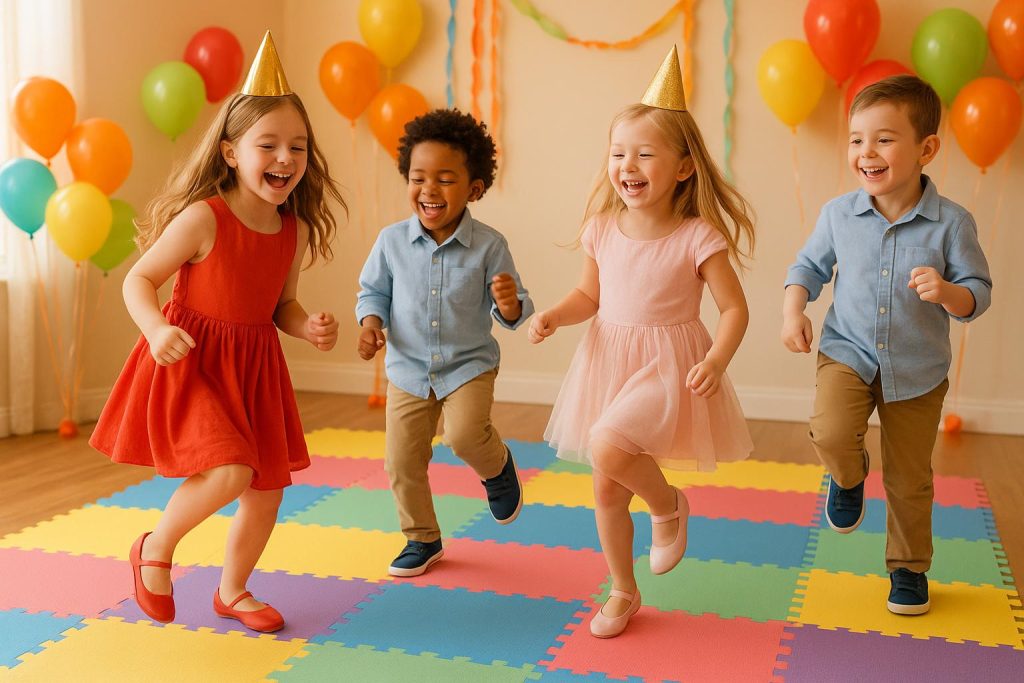
When planning a kids’ party, a DIY dance floor can be a fun and budget-friendly way to keep the event lively and organized. Instead of renting a professional setup, you can create a safe and defined space for kids to dance using everyday materials. Here are five creative options:
- Poster Board Dance Floor: Use neon poster sheets, black tape, and clear contact paper for a colorful, reusable surface. ($15–$25, 30–45 min setup)
- Neon Glow Tape Dance Floor: Create glowing designs with neon tape and blacklights for a vibrant indoor party. ($30–$50, 45–60 min setup)
- Interlocking Foam Mats: Soft, cushioned mats provide safety and are quick to assemble. Great for active themes. ($40–$80, 15–30 min setup)
- Temporary Carpet Tiles: Peel-and-stick tiles offer a polished look and are easy to remove after use. ($60–$120, 25–35 min setup)
- DIY Red Carpet Dance Floor: Roll out a red carpet runner for a Hollywood-style vibe. ($25–$75, 20–30 min setup)
Each option is simple to set up, affordable, and can be tailored to your party’s theme. Whether you’re hosting indoors or outdoors, these ideas ensure a fun, safe space for kids to enjoy.
1. Poster Board Dance Floor
A poster board dance floor is a budget-friendly way to bring energy and excitement to kids’ parties. Bright neon poster sheets set the tone for fun, and when paired with clear contact paper, they create a sturdy, reusable dance surface that’s perfect for lively celebrations.
Here’s how you can make your own eye-catching dance floor.
Materials Needed
- 30 pieces of 11×14-inch neon poster sheets in bold, vibrant colors
- Approximately 1.5 rolls of 3/4-inch black electrical tape (2 rolls recommended)
- 2 rolls of clear contact paper
Assembly Process
- Lay out the neon poster sheets on a flat surface in your desired pattern.
- Use black electrical tape to secure the sheets. At every four-board intersection, apply X-shaped pieces of tape for added stability, then tape along the outer edges to keep everything in place.
- Flip the entire assembly over and reinforce the seams on the back by overlapping tape along each joint.
- To protect the surface and make it more durable, cover the top with clear contact paper. Start at one corner, smoothing out air bubbles as you go. Overlap each row slightly to ensure a seamless, polished finish.
MagpieTayleetot shared their experience of creating a neon dance floor using 30 neon poster sheets, about 1 roll of black electrical tape (from the 2 purchased), and nearly 2 rolls of clear contact paper. The dance floor held up perfectly during a kids’ glow party, even with wet kids dancing on it after swimming. It also doubled as a photo booth backdrop and remained in great condition throughout the event.
2. Neon Glow Tape Dance Floor
Turn any room into a dazzling dance space with neon tape and a blacklight. This DIY idea is a hit for glow parties or any celebration where kids want to shine and groove like superstars.
You can get creative with this setup – design geometric shapes, outline dance steps, or even spell out a special message for the birthday kid. Under a blacklight, the neon tape comes alive with a vibrant glow, instantly boosting the party vibe.
What You’ll Need
- Neon glow tape (1-inch width works great)
- Blacklight or UV flashlight to activate the glow
- Measuring tape for precise layouts
- Scissors to cut the tape
- Clean cloth to prep the surface
- Optional: Glow-in-the-dark paint for extra flair
Perfect For
This glowing dance floor works best indoors, where lighting can be dimmed or controlled. Ideal for glow parties, disco-themed nights, or even space-inspired events, it’s especially effective in spaces like basements or rooms with blackout curtains. Once you’ve got your materials ready, it’s easy to create a dance floor that’ll keep the party glowing all night long!
3. Interlocking Foam Mats Dance Floor
Interlocking foam mats provide a soft, cushioned surface that helps absorb shocks and minimize injuries. Their bright, versatile design can fit any space and add an energetic vibe to your event. Plus, they’re reusable – perfect for future parties or even as play mats for kids.
These mats snap together effortlessly and offer great shock absorption, making them a fantastic choice for protecting little knees and elbows during inevitable slips and tumbles. Here’s everything you need to set up this practical and fun dance floor.
Materials Needed
To get started, you’ll need interlocking foam floor mats, usually sold in packs of 6-12 tiles. Each tile typically measures about 24 inches by 24 inches. For optimal cushioning, opt for mats that are at least ½ inch thick. If you’re setting up on a slick surface, consider using colorful tape to secure the edges.
Estimated Cost
Expect to spend between $40 and $80 to cover an area of approximately 48–96 square feet. Basic mats cost around $3–$5 per square foot, while higher-end options can range from $6–$8 per square foot, making this a budget-friendly and reusable choice.
Setup Time
Putting the mats together is quick and straightforward, taking about 15–20 minutes. Clearing the area beforehand might take a bit longer, but disassembling the mats after the event is just as easy.
Best For
These mats are ideal for indoor parties featuring kids aged 3 to 12, especially those with active or energetic themes. They work particularly well in homes with hard floors, offering a safe, cushioned surface that encourages kids to dance and move freely. Parents can relax knowing their little ones are protected while having a blast.
4. Temporary Carpet Tile Dance Floor
Carpet tiles are a stylish and practical choice for creating a temporary dance floor at indoor parties. They provide a defined, cushioned surface with excellent traction, making them perfect for kids to dance safely. Plus, they’re easy to remove without leaving any residue, so cleanup is a breeze. This affordable option adds a polished touch to your party setup without making any permanent changes to your space.
Materials Needed
To create your dance floor, you’ll need peel-and-stick carpet tiles in colors or patterns that match your party theme. Common sizes include 12 x 12 inches or 18 x 18 inches. Choose tiles with a strong adhesive backing that can be removed cleanly. For added stability on smoother surfaces, consider using double-sided carpet tape. You can also use colorful electrical tape to create borders or add decorative designs between the tiles.
Estimated Cost
Expect to spend between $60 and $120 for a dance floor covering 64 to 100 square feet. Basic carpet tiles usually cost $2-$4 per square foot, while options with fun patterns or extra cushioning can run $4-$6 per square foot.
Setup Time
Setting up the tiles takes about 25 to 35 minutes. The peel-and-stick process is easy, but you’ll want to take your time to align the tiles neatly and ensure tight seams. After the party, removing the tiles is quick and should take no more than 15 minutes.
Best For
This idea works best for indoor parties aimed at kids aged 5 to 14. It’s especially fitting for formal themes like Hollywood nights, princess balls, or dance contests. The sleek look of the carpet tiles helps create a festive atmosphere, while parents appreciate how they protect floors and establish a clear party zone that’s easy to monitor.
5. DIY Red Carpet Dance Floor
Turn your party space into a star-studded event with a DIY red carpet dance floor. This setup brings a Hollywood-style vibe, making every child feel like a celebrity while creating fun photo opportunities they’ll love.
Materials Needed
Start with a red carpet runner that fits your dance area. Look for one that has a non-slip backing for safety, and if you’re hosting outdoors, make sure it’s weather-resistant. Secure the edges with double-sided carpet tape to keep it in place. Want to take it up a notch? Add some gold rope or velvet stanchions to create a VIP entrance that screams glamour.
Estimated Cost
The cost depends on the size of the carpet, its quality, and any extra accessories you choose to include.
Setup Time
Setting this up is a breeze. Just roll out the carpet, tape down the edges, and add your decorative touches. Cleanup is just as easy – roll it back up and you’re done.
Best For
This idea works perfectly for both indoor and outdoor parties with themes like Hollywood, princesses, or award shows. It’s the perfect way to add a touch of glitz to any celebration.
Dance Floor Comparison Chart
When planning a DIY dance floor for your child’s party, it’s all about balancing your budget, time, and party setup. The chart below gives you a quick side-by-side comparison of some fun and practical dance floor options.
| Dance Floor Type | Materials Needed | Estimated Cost | Setup Time | Best For Indoor/Outdoor | Ideal Age Groups | Perfect Party Themes |
|---|---|---|---|---|---|---|
| Poster Board | Large poster boards, double-sided tape, markers/crayons | $15-$25 | 30-45 minutes | Indoor only | Ages 3-8 | Art parties, creative themes, small gatherings |
| Neon Glow Tape | Glow-in-the-dark tape, black lights, extension cords | $30-$50 | 45-60 minutes | Indoor preferred | Ages 5-12 | Glow parties, space themes, disco nights |
| Interlocking Foam Mats | Foam puzzle mats, cleaning supplies | $40-$80 | 15-30 minutes | Both indoor and outdoor | Ages 2-10 | Sports themes, active play, toddler parties |
| Carpet Tiles | Temporary carpet tiles, double-sided tape | $60-$120 | 45-75 minutes | Indoor only | Ages 4-12 | Formal themes, princess parties, elegant celebrations |
| Red Carpet | Red carpet runner, carpet tape, optional stanchions | $25-$75 | 20-30 minutes | Both indoor and outdoor | Ages 4-12 | Hollywood themes, award shows, princess parties |
Each option comes with its own strengths, depending on your party’s needs. Foam mats are a great choice for active kids who want to jump, dance, and play – they’re quick to set up and work indoors or outdoors. On the other hand, poster boards are a budget-friendly option perfect for younger children and smaller parties.
If you’re hosting an evening event, the glow tape dance floor is a showstopper, especially for older kids who’ll love the glowing, party-ready vibe. For a more polished look, carpet tiles are a fantastic choice, though they require a bit more time and money to pull off. And if you’re aiming for a glamorous touch, a red carpet setup is both simple to assemble and perfect for outdoor or indoor celebrations.
For outdoor events or quick cleanups, foam mats and red carpet setups are your best bet. However, options like poster boards and glow tape may need extra care when removing. And if you’re hosting a larger party, Bouncy Rentals offers add-ons that pair perfectly with these dance floor ideas, giving your celebration an extra boost of fun!
Conclusion
Each of the DIY dance floor ideas we’ve explored offers a fun and practical way to elevate your child’s party without breaking the bank or requiring professional help. Whether you go with colorful poster boards (budget-friendly at $15–$25), a glowing neon tape design for that extra pop, or reusable interlocking foam mats for a longer-lasting option, you can create a dance floor that fits your party’s theme and your needs perfectly.
What makes these DIY options so appealing is their ability to adapt to any celebration theme. Adjust the colors, size, and decorations to transform your space into anything from a glamorous red carpet event to a glow-in-the-dark galaxy adventure. Installation times vary, so you can pick an option that works with your schedule and party prep.
Want to take things up a notch? Add some excitement with rentals from Bouncy Rentals. From bounce houses and inflatable obstacle courses to fun extras like cotton candy machines, popcorn makers, and snow cone machines, you can turn your backyard into a full-on entertainment hub. With sanitized, insured equipment delivered by a friendly team, you can sit back and enjoy the day while the kids dance, play, and create unforgettable moments.
A DIY dance floor is more than just a space for dancing – it’s a centerpiece for fun and creativity. Let your little ones shine as they show off their moves and create memories that will last a lifetime.
FAQs
How can I make sure the DIY dance floor is safe and sturdy for kids?
To make sure your DIY dance floor is both safe and sturdy for kids, start by using a flat, solid base – plywood works great – on an even surface. This creates a reliable foundation for all the dancing fun. Double-check that everything is securely fastened, and ensure the surface is smooth and clear of tripping hazards like gaps or loose edges.
Before the festivities begin, give the dance floor a trial run by walking and dancing on it to confirm it’s stable. For extra safety, set up the dance floor in a shaded spot to keep it cool, and encourage kids to wear soft shoes or socks to reduce the risk of slipping. A little planning ensures the fun stays safe and stress-free!
How do I choose the best dance floor for a kids’ party based on the theme and location?
To choose the ideal dance floor for a kids’ party, start by evaluating the party location. Ensure the dance floor fits comfortably within the available space and is easily accessible for all guests. If the party is outdoors, opt for sturdy materials that can handle uneven ground. For indoor events, you might have more flexibility to use lighter or decorative options.
Next, consider the party theme. Coordinate the dance floor’s design or colors with the overall vibe of the event – whether it’s a princess-themed celebration, a superhero adventure, or a glow-in-the-dark extravaganza. Adding themed decorations or playful lighting can take the dance floor to the next level of fun.
By aligning your choice with the venue and theme, you’ll create a lively and safe space where kids can dance their hearts out!
Can I reuse a DIY dance floor for future kids’ parties? How should I store it?
Yes, you can definitely reuse a DIY dance floor for future events if you take proper care of it. To simplify reassembly, try constructing the floor in sections and clearly labeling each piece. Connectors like mending plates are a great option to keep the sections firmly in place during use.
When it’s time to store the floor, make sure to clean each panel thoroughly to get rid of dirt or debris. Store the pieces in a dry, climate-controlled area to avoid warping or other damage. Stack them flat to help maintain their shape, so they’re ready to dazzle at your next celebration!