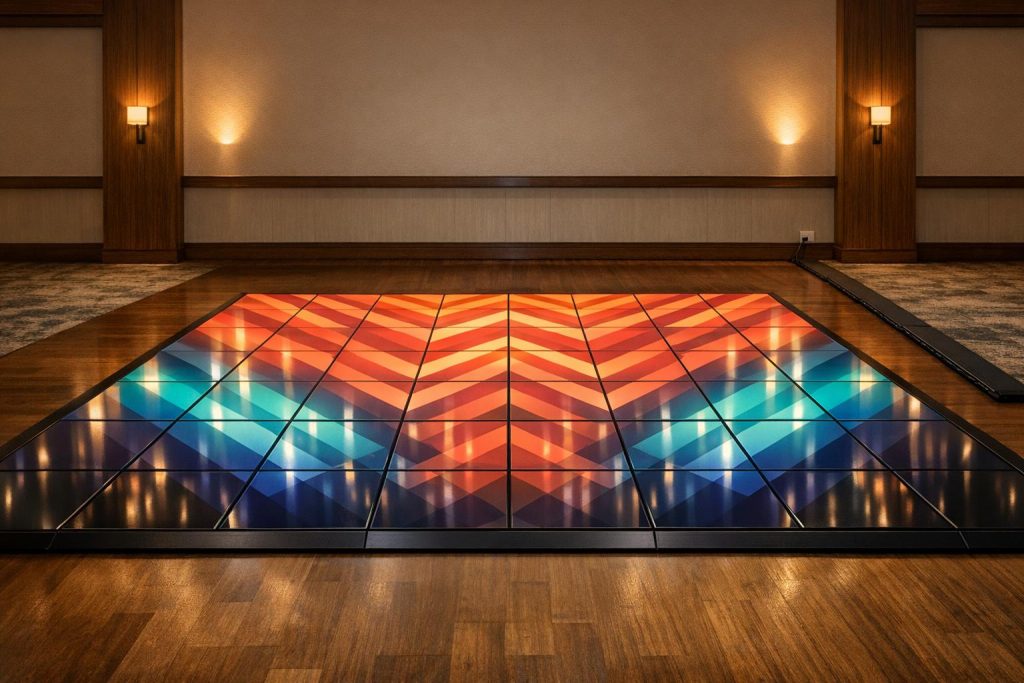
LED dance floors are a game-changer for parties, weddings, and corporate events. These floors combine vibrant lighting with interactive features to create a visually striking and engaging centerpiece for any celebration. Here’s what you need to know:
- What they are: Modular panels with LED lights beneath a durable, slip-resistant surface. Many sync with music or respond to movement.
- Why use them: They enhance the atmosphere, encourage dancing, and can be customized with colors, patterns, and even logos.
- Sizes: Choose based on guest count. For 100 guests, a 16′ x 16′ floor fits about 50 dancers at once.
- Setup tips: Ensure the venue has adequate power (2–3 dedicated 20-amp circuits) and a flat surface. Installation takes 30 minutes to 2 hours depending on the system.
- Costs: Rentals average $25 per square foot, with basic setups starting at $1,500. Custom features cost extra.
LED dance floors can transform your event into a memorable experience when planned carefully. From syncing the lights with music to ensuring safety and smooth installation, these floors are a surefire way to impress your guests.
How to Choose the Right LED Dance Floor
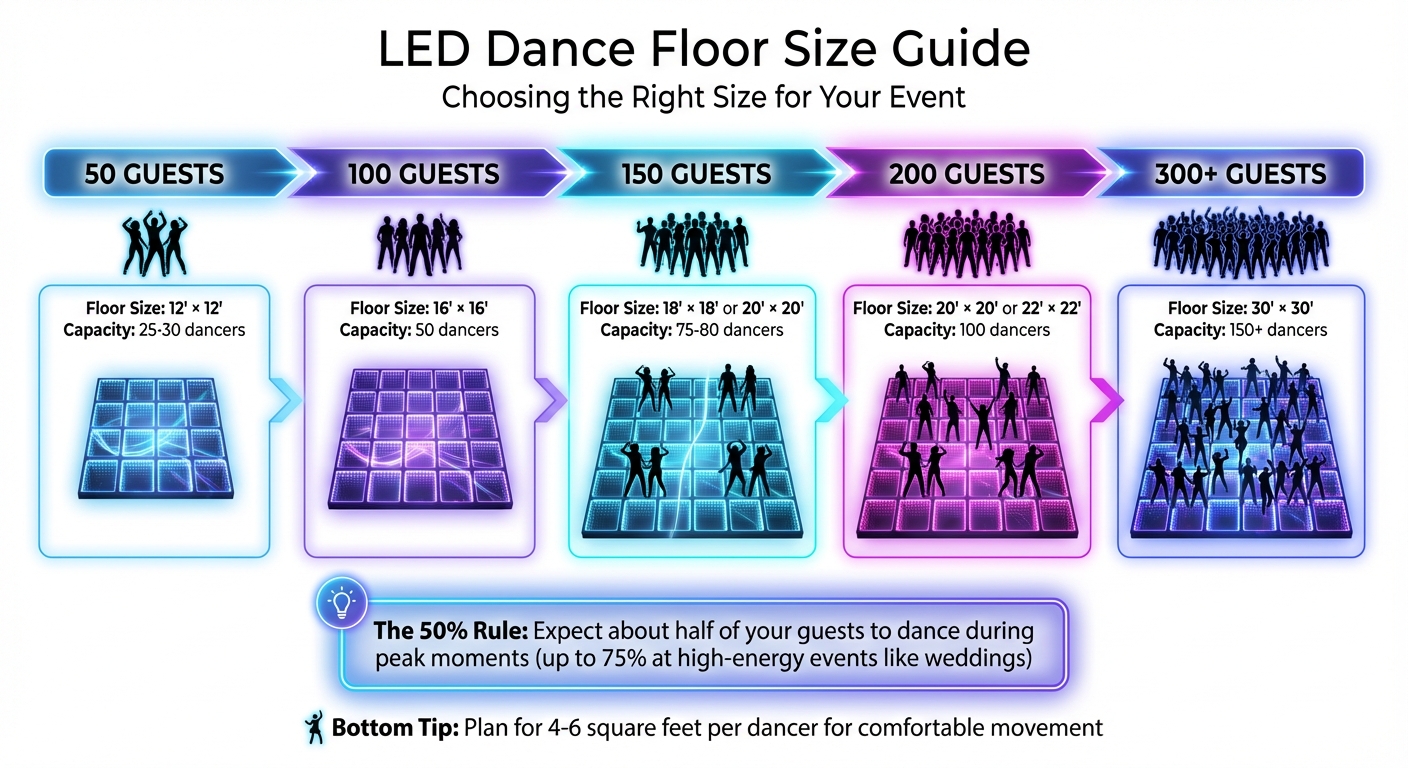
LED Dance Floor Size Guide by Guest Count
Selecting the perfect LED dance floor means considering both the number of dancers and the vibe of your event. A common rule of thumb is the "50% rule" – expect about half of your guests to hit the dance floor during peak moments. For high-energy events like weddings, this number can jump to 75%.
Dance Floor Sizes by Event Type
To keep everyone comfortable, plan for 4 to 6 square feet per dancer. For example, a 12′ x 12′ floor (144 square feet) works well for smaller events with fewer than 50 guests, accommodating 25 to 30 dancers at once. For a wedding with 150 attendees, an 18′ x 18′ or 20′ x 20′ floor fits the bill, holding 75 to 80 dancers. Corporate events often go for mid-sized floors, such as 16′ x 16′, which balance dancing space with room for presentations or branding.
| Guest Count | Recommended Floor Size | Capacity (Dancers at Once) |
|---|---|---|
| 50 Guests | 12′ x 12′ | 25–30 Dancers |
| 100 Guests | 16′ x 16′ | 50 Dancers |
| 150 Guests | 18′ x 18′ or 20′ x 20′ | 75–80 Dancers |
| 200 Guests | 20′ x 20′ or 22′ x 22′ | 100 Dancers |
| 300+ Guests | 30′ x 30′ | 150+ Dancers |
A packed dance floor often feels more lively and energetic than a larger one with fewer people. For kids’ parties, a compact 12′ x 12′ floor usually does the trick, while bigger weddings typically need a 20′ x 20′ or larger setup.
Once you’ve settled on size, it’s time to think about the technical and logistical details.
What to Consider When Renting
LED dance floors come with specific technical needs. Most require 2–3 dedicated 20-amp circuits. It’s essential to coordinate with your venue early to confirm they can handle this power demand. For outdoor events or uneven ground, make sure the floor is waterproof and consider using a professional subfloor.
Safety is another key factor. Look for rentals that include beveled edging to meet ADA compliance standards and prevent tripping hazards, as most floors are about 2 inches high. Keep at least 4 feet of clearance around the dance floor perimeter for easy access.
Pricing for LED dance floors averages around $25 per square foot. Basic setups typically cost between $1,500 and $1,800. If you want custom features like logos or specific color programming, expect to pay an additional $500 to $2,000. As rental expert Marcus Webb wisely advises:
Always ask for the full itemized breakdown – surprises are great on the dance floor, but not on your invoice.
Choosing the right size and addressing technical details ensures your LED dance floor becomes the centerpiece of your event, keeping guests entertained and the energy high all night long.
Setup and Installation Tips
Getting the installation right is key to ensuring your event runs smoothly. With proper preparation and attention to detail, the process becomes much more manageable.
Preparing Your Venue
A few days before your event, take time to inspect the installation area. Make sure the surface is flat, dry, and free of debris. Using a level tool can help you identify any uneven areas – these need to be addressed, as uneven surfaces can lead to disconnections or safety issues. For outdoor setups on grass or gravel, consider laying down a subfloor or stability boards to create a solid, even base.
Double-check the venue’s power capabilities to ensure they can handle the electrical load required for the setup. Leave at least 2 feet of clearance around the floor’s perimeter for safe cable management. Plan to start the installation about 3–4 hours before the event begins. This gives you enough time for setup, programming, and troubleshooting any issues that may arise.
Once the venue is ready, decide on the connection method that best suits your timing and stability needs.
Installation Methods
LED dance floors typically use one of three connection systems, each with its own setup time and stability benefits:
- Magnetic connection systems: These tool-free systems use magnetic locks, allowing you to assemble a 10×10 ft floor in just 30–45 minutes.
- Interlocking systems: These require mechanical edges to be locked together, often with a rubber mallet. Setup time is around 1–1.5 hours, but they offer excellent stability.
- Wired systems: This method involves connecting panels with individual cables. It takes about 1.5–2 hours to complete.
Once you’ve selected the system, follow the step-by-step instructions to ensure a professional installation.
Step-by-Step Setup Process
Start assembling the floor from one corner, working outward. Pay close attention to detail during setup, as this ensures a polished look and smooth operation. After connecting each section, test it immediately to identify and address any faulty panels early on.
Before attaching panels, inspect all connection points to remove dust or debris that could disrupt electrical contact. Secure all cables with zip ties or cable protectors, especially in areas where they may cross walkways. Once the floor is fully assembled, install beveled safety edging along all sides to reduce trip hazards.
Finally, power up the system and test all lighting modes to confirm everything is functioning as expected. Always remember to power down the system completely before performing electrical repairs or replacing panels.
Getting the Most from Your LED Dance Floor
After setting up your LED dance floor, there are plenty of ways to make it the star of your event. From customizing lighting effects to adding exciting extras, a little planning can take your party to the next level.
Customizing Lighting Effects
Today’s LED dance floors come with a variety of control options that let you tailor the lighting to fit your event’s vibe. Whether you’re using a remote, a smartphone app, or DMX programming for advanced setups, you can fine-tune the floor to match the mood. For a hands-off approach, try the sound-activated mode, which syncs the lights to the music, creating a dynamic and engaging atmosphere.
Hosting a corporate event or a branded celebration? High-resolution LED floors can display custom animations, logos, hashtags, or even live video feeds to make your event feel one-of-a-kind.
“Program the floor via DMX to integrate with wash or intelligent lighting.”
Plan your lighting to follow the rhythm of your event. For instance, use soft, ambient hues during dinner or speeches, then ramp up to vibrant, energetic patterns when it’s time to hit the dance floor. Sync the floor’s controller with your DJ’s equipment to ensure the visuals align perfectly with the music. And don’t forget to test your custom patterns well in advance to avoid any last-minute hiccups.
Pairing your lighting effects with other party features can make your event even more unforgettable.
Pairing LED Dance Floors with Party Add-Ons
An LED dance floor is impressive on its own, but it truly shines when paired with complementary party elements. At Bouncy Rentals, you can create an all-around entertainment experience by adding classic party extras like cotton candy machines or popcorn machines. Setting these up near the dance floor not only provides fun treats but also enhances the visual appeal of the space.
For outdoor events, consider adding a dunk tank nearby to give guests a playful break from dancing. The LED floor’s glow also doubles as ambient lighting for evening activities. Fog machines and laser lights are fantastic additions, as their effects reflect off the illuminated floor, creating a stunning multi-sensory experience. Hand out glow sticks or light-up bracelets to guests – they’ll become part of the light show themselves!
Before you go all out, check the venue’s power capacity. A 10×10 ft LED dance floor typically requires a dedicated 20-amp circuit. Make sure the venue can handle the combined electrical load of the floor and any additional elements you’re planning to include.
Maintenance, Safety, and Rental Tips
After the excitement of setting up and customizing your LED dance floor, keeping it in top shape is essential for a smooth and safe event. These floors are designed to handle plenty of use, but taking care of potential issues beforehand can help avoid accidents or malfunctions.
Safety Guidelines
Before your guests step onto the dance floor, inspect it thoroughly for any damage. Check for flickering lights, loose connections, or cracks in the panels. Use a level tool to ensure the floor is completely even. If you’re setting up outdoors or on an uneven surface, subfloors or stability boards can help create a solid foundation , similar to the requirements for weather-resistant outdoor event equipment. When planning for your crowd, aim for about 4 to 6 square feet per dancer to give everyone enough room to move comfortably.
Secure all power and data cables with professional-grade tape or cable protectors to prevent trips or accidental disconnections. To protect the floor’s electrical system from power surges, use surge protectors or voltage stabilizers. For reference, a standard 10×10 ft LED dance floor usually requires a dedicated 20-amp circuit.
Encourage guests to avoid wearing sharp heels or hard-soled shoes, as these can scratch the tempered glass or acrylic surface. Offering soft-soled shoes or socks as an alternative is a great way to prevent damage. Placing doormats or carpet runners at the entrance can also help keep dirt and moisture off the LED panels.
"The difference between an amateur and professional LED dance floor installation isn’t just the equipment – it’s attention to detail during setup and proper maintenance afterward." – Katy, Lead Technician, ACS
Once these safety steps are handled, focus shifts to keeping the floor spotless and functional.
Cleaning and Maintenance
A clean dance floor isn’t just about looks – it’s about safety too. Blot spills immediately with a clean cloth to avoid stains or slippery spots. Stick to mild cleaning solutions like a vinegar-and-water mix, and use soft microfiber cloths or damp mops. Stay away from harsh chemicals or abrasive tools that could scratch or damage the surface.
For tougher stains like lipstick or ink, use a cloth lightly dampened with rubbing alcohol, but test it on a hidden area first to ensure it doesn’t harm the finish. And always power down the system before attempting any electrical repairs.
Booking and Timing Advice
To avoid last-minute stress, secure your LED dance floor rental well in advance, especially if your event is in a busy market like Los Angeles or New York City. These floors are in high demand during peak seasons and can book up quickly.
Double-check with your venue to confirm power supply availability and weight limits before finalizing your rental. For larger events, it’s smart to include on-site technical support in your rental package to handle any unexpected issues that might arise. Also, request a detailed, written breakdown of all costs, including delivery, setup, teardown, and any after-hours fees.
Conclusion
An LED dance floor can transform your event into an unforgettable experience when planned and executed thoughtfully. The key lies in getting the details right – choosing the right size, booking early, and performing thorough technical and safety checks.
Make sure to secure your rental well ahead of time, especially during busy seasons or holidays, to avoid last-minute disappointments. Double-check that your venue meets the electrical and surface requirements discussed earlier. As event designer Juan Mendez wisely advises:
Don’t just follow the crowd – pick an LED dance floor experience that tells your story, not just one that flashes the brightest.
Safety should always be a priority. Opt for floors with non-slip surfaces and ramped edges under 2 inches high for easy accessibility. Also, leave enough space around the floor to ensure smooth guest movement and enhance interaction.
When you combine proper planning, customization, and safety measures, your LED dance floor becomes more than just a flashy feature. It turns into the centerpiece of your event, creating those picture-perfect moments that guests will rave about. Work closely with your rental provider to finalize the details, and let your LED dance floor take center stage at your event.
FAQs
Do I need a DJ or DMX to control the floor?
A DMX controller is essential for managing the lighting effects on an LED dance floor, particularly when it comes to programmable or interactive features. While DJs focus on managing the sound, they don’t directly control the lighting. To create the desired lighting effects, a DMX controller is typically the go-to solution.
Can an LED dance floor be used outdoors?
Yes, LED dance floors can be used outdoors, but only under specific conditions. The weather must be dry, with no chance of rain, and the surface where the floor is placed needs to be perfectly level to ensure proper functionality. It’s also crucial to keep the dance floor dry – avoid any water exposure or drink spills. Always double-check that the setup area meets these requirements to ensure safe and effective use.
What fees are usually added to the rental price?
When renting an LED dance floor, there are often additional fees to consider. These can include charges for delivery, setup, and takedown. If you’re looking for customization options or have unique event requirements, those might come with extra costs as well. To avoid any unexpected expenses, it’s a good idea to confirm all potential charges upfront when making your booking.