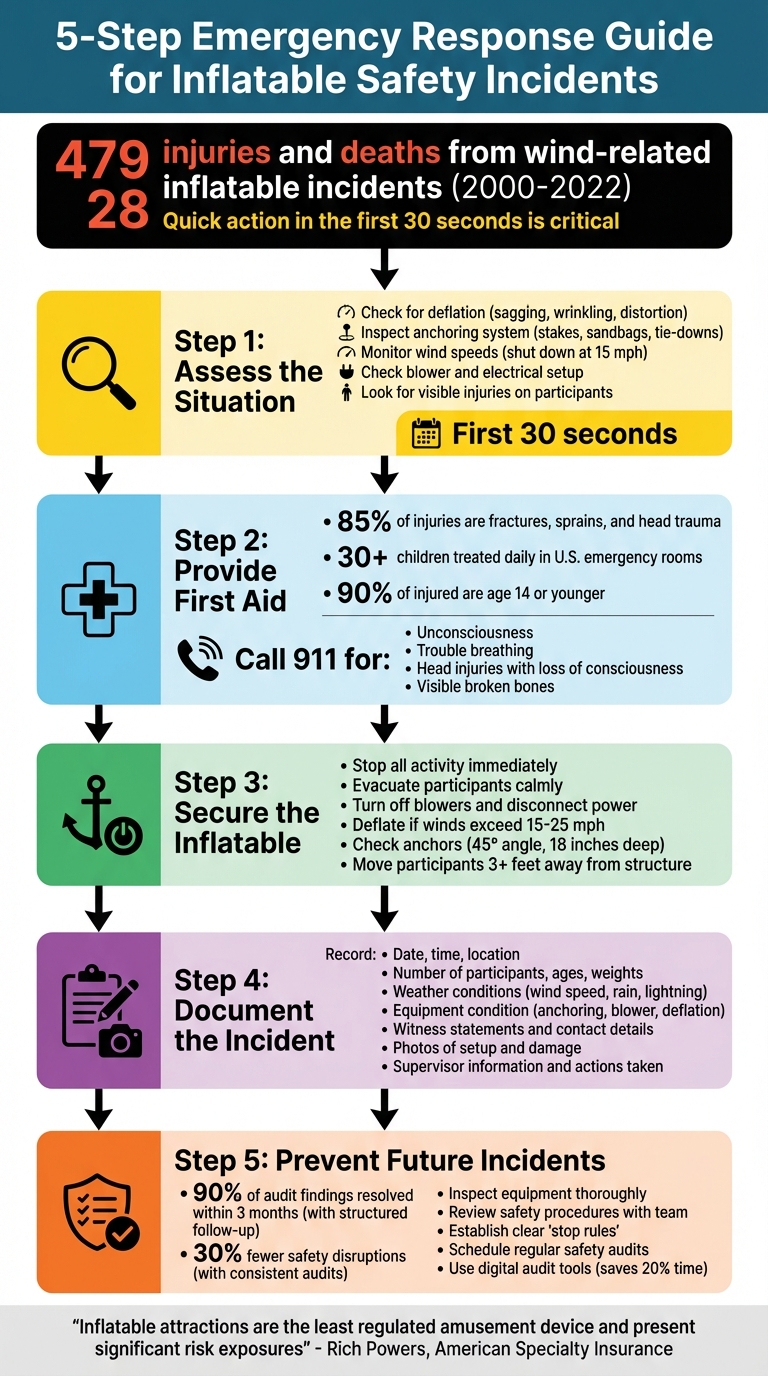
Inflatables can bring joy to events, but they also pose risks if not managed properly. Between 2000 and 2022, wind-related inflatable incidents caused 479 injuries and 28 deaths. This guide outlines how to respond effectively to such emergencies, focusing on safety, injury care, and prevention. Key steps include:
- Assess the Situation: Quickly inspect the inflatable for deflation, loose anchors, or hazards like high winds or electrical issues. Evacuate participants to safety if necessary.
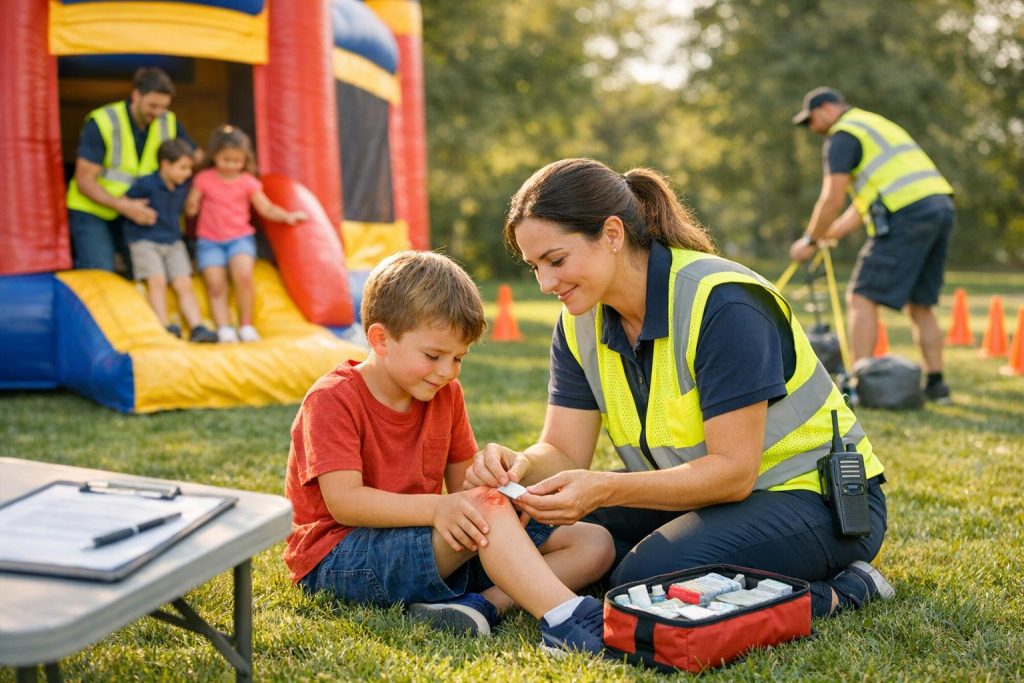
- Provide First Aid: Treat common injuries such as scrapes, sprains, or head trauma. Call 911 for severe cases like unconsciousness or visible fractures.
- Secure the Inflatable: Shut down blowers, stabilize anchors, and deflate the structure if conditions are unsafe.
- Document the Incident: Record details like time, weather, injuries, and equipment conditions to support insurance claims and identify safety gaps.
- Prevent Future Issues: Inspect equipment, review safety protocols, and conduct regular audits to ensure safer operations.
Preparation and quick action can prevent injuries and protect event organizers from fines or liability. Always prioritize safety and ensure participants are out of harm’s way before troubleshooting equipment.
5-Step Emergency Response Guide for Inflatable Safety Incidents
Step 1: Assess the Situation Right Away
The first 30 seconds after an incident are critical. How you respond in this short window can mean the difference between resolving a minor issue and facing a serious emergency. Start by evaluating both the inflatable and the participants to decide on your next steps.
Check the Area Visually
Begin with a quick inspection of the inflatable. Look for signs of deflation like sagging, wrinkling, or any noticeable distortion – these could indicate a potential collapse. Examine the anchoring system on surfaces like concrete to ensure it’s secure. Check for pulled-out stakes, shifted sandbags, or loose tie-downs.
"Keep an eye out for deflation (sagging, wrinkling, distortion) and remove children from the inflatable if you notice such signs."
– Pogo Bounce House
Next, scan the surrounding area for hazards. Rising wind speeds are a major concern – most manufacturers recommend shutting down the inflatable if winds approach 15 mph. Also, check for wet surfaces that could cause slips or burns if heated by direct sunlight. Overhead, look for any shifted power lines or tree branches that could pose a danger.
Don’t overlook the blower and electrical setup. Listen for unusual noises or signs of blower failure. Verify that extension cords are intact and that the GFCI adapter is working as it should. If you’re using a fuel-fired generator, ensure there are no exhaust fumes or signs of carbon monoxide nearby.
Once you’ve secured the area and equipment, turn your attention to the participants.
Check for Injuries and Move Participants to Safety
Look for any visible injuries among the participants. Signs like holding a limb, clutching their head, or struggling to stand could indicate fractures, sprains, or head trauma – injuries that account for 85% of bounce house accidents. Watch for anyone who seems dazed, confused, or is crying, as these could also signal distress.
If the inflatable shows any signs of instability or deflation, evacuate everyone immediately to prevent entrapment. Move participants to a safe safety perimeter that’s at least 3 feet away from the structure, and keep spectators at a safe distance to ensure the area remains clear.
Step 2: Provide First Aid and Medical Care
Once everyone is safely evacuated and the area is secure, turn your attention to treating any injuries. Each day, more than 30 children in the U.S. are treated in emergency rooms for injuries related to inflatables like bounce houses.
Common Injuries and Treatment Steps
The majority of bounce house injuries – about 85% – are fractures, sprains, and head injuries. Roughly two-thirds involve arms and legs, while 15% affect the head or face. Nearly 90% of those injured are kids aged 14 or younger.
For minor scrapes or cuts, clean the wound with soap and water, apply antibiotic cream, and cover it with a bandage. Keep an eye out for any signs of infection. In cases of friction burns, use a topical burn cream to soothe the area. If someone shows symptoms of heat exhaustion – like dizziness, heavy sweating, or nausea – move them to a cooler spot, elevate their feet, and sponge their body with cool water to lower their temperature.
For sprains and fractures, handle the injured area with care. Immobilize it, apply ice to reduce swelling, and seek professional medical help if there’s swelling, an inability to bear weight, or visible deformity.
"Seek immediate medical attention if your child sprains or breaks a bone, is suspected to have a concussion, or severely hurts their head, neck, or spine."
– Tracy Mehan, Manager of Translational Research, Center for Injury Research and Policy
If you suspect a head, neck, or spine injury, avoid moving the person unless absolutely necessary. Keep them calm and still until emergency services arrive.
When to Call 911
Dial 911 right away if you notice any of the following: unconsciousness, trouble breathing, ongoing chest pain, confusion, bluish lips or face, head injuries with loss of consciousness, suspected skull fractures, or visible broken bones.
When calling, provide critical details such as your exact location, your phone number, and a quick description of the injuries. Many 911 centers can guide you through first aid or CPR over the phone while help is on the way. Stay on the line until the dispatcher tells you it’s okay to hang up – they might need more information or offer further instructions.
Make sure the area around the injured person is clear, giving first responders enough room to work when they arrive.
Step 3: Secure and Stabilize the Inflatable
After addressing immediate safety concerns, such as injuries and evacuating participants, your next priority is stabilizing the inflatable. Never leave the inflatable unattended while inspecting power sources or blowers until all participants are safely evacuated.
How to Evacuate Participants
First, stop all activity and provide clear, firm instructions for evacuation. Staying calm is essential – panic often leads to secondary injuries during these situations. Guide everyone to the nearest exit in an organized manner, prioritizing younger children or toddlers who may need extra assistance during the process.
"Remain Calm! You will have sufficient time to help the riders to quickly and safely exit the ride. This situation tends to cause panic . . . unless the operator stays calm and relaxed."
– Party Rental Professional
If the inflatable is deflating quickly, hold up the walls or entrance to keep the exit clear and prevent participants from being trapped under the heavy material. Before the structure fully collapses, check hidden areas like tunnels or spaces under walls to ensure no one remains inside. Once everyone is safely outside, move them to a designated safe area away from the inflatable and its power sources.
When all participants are accounted for, you can focus on shutting down and securing the equipment. This includes following proper steps to fold and store bounce houses once the area is clear.
Shut Down and Secure the Equipment
After evacuation, turn off the blowers and disconnect them to avoid accidental re-inflation or electrical hazards. If the issue is weather-related – such as strong winds over 25 mph or nearby lightning – deflate the unit immediately and relocate blowers to a dry spot. Manufacturers generally advise evacuation and deflation when wind speeds exceed 15 to 25 mph.
To speed up deflation, open all zippers located near the base of the inflatable. If the inflatable shifted or tipped over, inspect and reinforce the anchor points. Stakes should be driven at a 45-degree angle and embedded at least 18 inches into the ground for stability. Before considering re-inflation, check for issues like disconnected blower tubes, tripped GFCIs, or any structural damage. Do not reinflate the unit if there are tears or other significant damage.
Step 4: Document the Incident
Once immediate safety measures are in place and the equipment is secure, the next step is to document the incident thoroughly. This step is crucial to support insurance claims, reduce liability risks, and help prevent similar accidents in the future. Proper documentation not only shows compliance with industry standards during investigations but also confirms that safety protocols were followed when the incident occurred.
Without detailed records, you could face denied insurance claims, legal challenges, or difficulty identifying recurring issues with your equipment. Just as quick action can prevent further injuries, accurate documentation can help uncover patterns – like gaps in supervision or problems with anchoring – that may contribute to accidents.
Here’s what you need to include in a comprehensive incident report.
What to Include in Incident Reports
Start by noting the exact date, time, and location of the incident. Record how many participants were on the inflatable at the time, along with their ages, sizes, and weights, to verify that capacity and age limits were observed. Be specific about any injuries, detailing the affected body parts and the circumstances under which the injuries occurred.
Weather conditions are another critical factor to document. Include details like wind speeds, rain, or lightning, as weather-related issues have caused 479 injuries and 28 fatalities between 2000 and 2022. Assess and record the equipment’s condition, checking for issues such as anchoring failures, blower malfunctions, or deflation. Identify the on-site supervisor, their training level, and their actions during the incident. Additionally, gather witness statements, contact details, and take clear photos of the setup, including anchoring points and any damage. Attach the signed rental agreement, which confirms the renter was informed of all safety and operating procedures.
Use Rental Company Forms
To make the documentation process easier, use the standardized forms provided by Bouncy Rentals USA. These forms are designed to ensure you capture all critical details, such as participant information, weather conditions, and supervision records – elements that are vital for insurance claims and expert reviews.
Using these forms also helps demonstrate compliance with ASTM F2374 standards, which regulate the design, manufacture, and operation of inflatable amusement devices. The forms include fields for signed acknowledgments, confirming that renters understood the installation and operating instructions. They also act as a checklist for visual documentation, prompting you to photograph key elements like anchoring points, blowers, and any potential hazards in the area. Keep these completed forms with your rental records to support insurance claims and maintain smooth business operations.
Step 5: Follow Up and Prevent Future Incidents
Once the incident is fully documented, it’s time to shift gears and focus on preventing it from happening again. Think of this as a chance to identify safety gaps and strengthen your operations. Companies with structured follow-up processes resolve 90% of audit findings within three months, compared to just 60% for those without such systems. Every incident is an opportunity to improve.
Inspect and Repair Equipment
Begin with a thorough inspection of the inflatable involved, even if it looks fine at first glance. Check the vinyl for any tears, punctures, or worn areas, especially at stress points like corners. Pay close attention to double-stitched seams for loose threads or gaps that could worsen under pressure. Test the blower to ensure it operates smoothly, and inspect electrical cords and GFCI adapters for any damage. A faulty blower could lead to a dangerous collapse.
Make sure weight limit tags and safety warning labels are still legible and securely attached. For more complex inflatables, inspect internal components like baffles, climbing walls, or interactive sections for any hidden damage. If the incident was severe or the inflatable is heavily used, consider hiring a professional to service the blower motor and test the anchoring system against wind-load standards. Always stick to manufacturer-approved replacement parts and reinforced stitching to maintain the unit’s safety rating.
Review Safety Procedures with Your Team
Hold a post-incident debrief with your on-site team. Pinpoint whether the issue stemmed from equipment failure, site conditions, or supervision lapses. Bob Urban, Senior Manager at ACRT Services, advises:
"Safety audits of your crew should be performed at random and be unanticipated to get a real sense of how your crew is performing".
Use this opportunity to reinforce emergency procedures and clarify who has decision-making authority in critical moments.
Establish clear "stop rules" for situations like bad weather or unsafe participant behavior. This ensures stopping activity is a safety-first decision, not a matter of debate. Make sure every team member knows their role in the Emergency Action Plan – whether it’s calling 911 or managing crowd control during an evacuation. Treat safety planning as an ongoing, structured process rather than a one-time effort. Then, formalize these lessons with regular safety audits.
Schedule Regular Safety Audits
Routine safety audits are essential for catching potential problems before they escalate. Using digital audit tools can save time – up to 20% – and improve accuracy. Focus on high-risk areas like anchoring systems, blower performance, and weather-monitoring protocols.
For an unbiased evaluation, consider hiring third-party auditors. Amanda Ferraro, CEO of Aviation Safety Solutions, explains:
"Organizations may become lax in their procedures and processes without that extra pair of eyes. Their safety practices may be very much out of date if they haven’t undergone an audit recently".
She also points out:
"The adoption of a safety auditing program is the cheapest insurance policy you can buy".
Categorize your findings by severity – critical, major, or minor – and assign clear deadlines and responsibilities for addressing them. Companies with consistent audit programs see 30% fewer safety-related disruptions compared to those with sporadic practices.
Conclusion
Responding effectively to inflatable incidents hinges on acting quickly, staying organized, and remaining calm under pressure. When things go wrong – whether it’s a power outage, unexpected weather, or an injury – swift action can help prevent chaos and reduce risks. As Rich Powers, Executive Vice President of Risk Services at American Specialty Insurance, emphasizes:
"Inflatable attractions are the least regulated amusement device and present significant risk exposures that should not be taken lightly".
The key steps are simple but crucial: assess the situation, provide aid, evacuate participants, document the incident, and review what happened. Acting efficiently can make all the difference in keeping everyone safe. Always prioritize evacuation – troubleshooting can wait until everyone is safely away from the inflatable.
At Bouncy Rentals USA, safety is at the forefront of every rental. Our inflatables are fully insured, meticulously cleaned, and delivered on time by professionals trained in proper setup and emergency protocols. We handle the logistics, so you can focus on enjoying your event. Choosing a provider that prioritizes safety from start to finish means you’re ensuring a worry-free experience.
Being prepared is about more than having a plan – it’s about having the training, procedures, and dependable equipment to turn potential crises into manageable scenarios. With the right approach, you can protect your guests and keep your event running smoothly.
FAQs
What should I do first if the inflatable starts to deflate?
If an inflatable starts to lose air, the first step is to prioritize safety. Have all participants exit the inflatable right away to avoid any risks of tripping or falling. Once everyone is safely out, take a moment to inspect the inflatable and its blower to figure out what’s causing the issue and address it properly.
How can I tell when wind is too strong to keep an inflatable running?
Wind speeds above 15 mph make inflatables dangerous. Regularly check wind conditions using an anemometer or a reliable weather app. If winds hit 15 mph or higher, stop usage immediately, deflate the inflatable, and guide everyone to safety. While securing inflatables with anchors is important, deflation and evacuation should always take precedence in strong winds to avoid accidents. Staying vigilant about weather conditions is key to keeping outdoor events safe.
What details should I record for an inflatable incident report?
When documenting an inflatable incident, it’s crucial to include all relevant details to ensure proper follow-up and adherence to safety protocols. Here’s what to cover:
- Date, time, and location: Record when and where the incident happened.
- Incident description: Include specifics like weather conditions, the state of the equipment, and any safety measures in place.
- Individuals involved: Note the names, ages, and any injuries sustained by those affected.
- Visual evidence: Take photos or videos of the scene and the equipment involved.
- Immediate actions: Detail steps taken right after the incident, such as administering first aid or contacting emergency services.
Thorough documentation not only helps with compliance but also ensures that all necessary steps are taken to address the situation.