When modifying inflatable obstacles, safety should always come first. Improper changes can compromise the structure, lead to accidents, and create liability issues. Follow these key steps to ensure safe modifications:
- Review Manufacturer Guidelines: Stick to the recommended materials and anchoring standards. Use heavy-duty vinyl (18 oz) and double-stitched seams that meet fire-retardant standards.
- Inspect for Weak Spots: Check seams, anchor points, and high-stress zones for damage before making changes.
- Follow Local Safety Rules: Ensure modifications comply with regional regulations and insurance policies.
- Use Secure Add-Ons: Choose lightweight, durable materials and attach them using weather-resistant straps or ropes.
- Test Modifications: Stress-test all changes to ensure stability under load and document the results.
- Anchor Properly: Regularly inspect anchor points and ensure they remain secure during use.
- Post-Event Maintenance: Clean, inspect, and store equipment properly to prevent damage.
Safety Requirements Check Before Making Changes
Before making any changes to your inflatable, it’s essential to perform a detailed safety assessment. This will help identify areas where modifications can be made safely.
Check Manufacturer Guidelines First
Start by reviewing the manufacturer’s guidelines, which are aligned with ASTM F2374-22 standards. These guidelines specify that modifications must use heavy-duty vinyl (at least 18 oz) with double-stitched seams and meet NFPA 701 fire-retardant standards.
Manufacturers often place strict limits on modifications. If changes are permitted, they must adhere to the approved materials and anchoring standards outlined in the documentation. Look for sections in the manual that clarify modification limits, acceptable materials, and structural specifications.
Pay close attention to the anchoring system requirements. Modifications can affect existing anchor points or necessitate new ones, so understanding these specifications is critical. The ASTM F2374-17 includes detailed guidelines for anchoring system designs, which manufacturers incorporate into their recommendations.
Once you’ve reviewed these standards, inspect the inflatable for any weak spots that could be problematic.
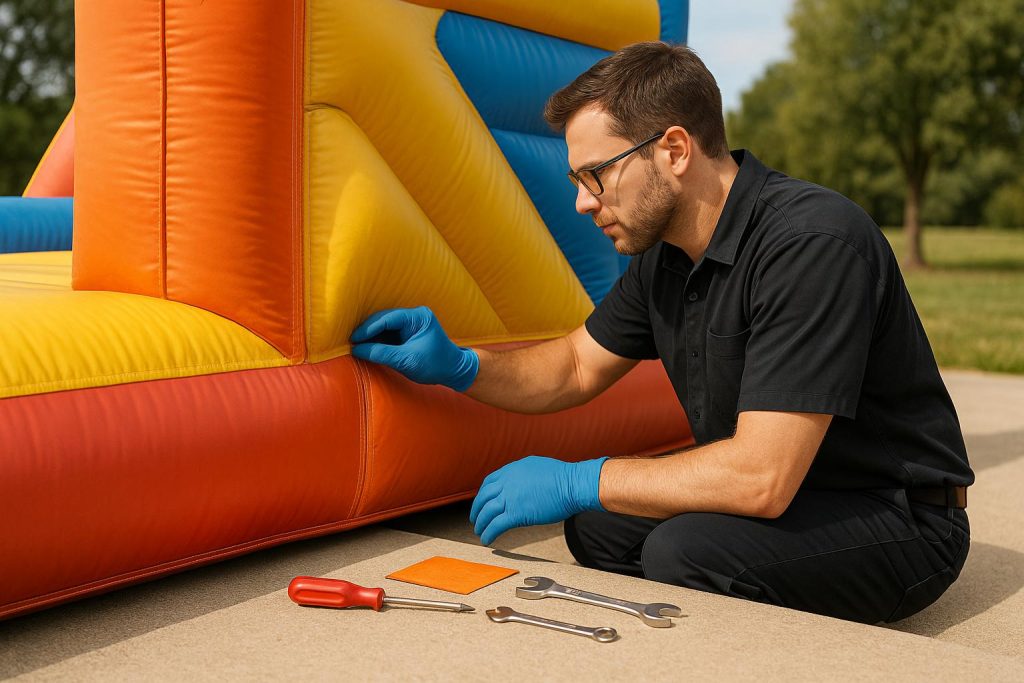
Look for Weak Spots in the Inflatable
Lay the inflatable out on a clean, flat surface and check for any signs of wear, such as tears, holes, frayed seams, or other weak areas.
Pay special attention to high-stress zones like slide entrances, climbing walls, and anchor points. These areas endure the most strain and are more likely to show damage. Since modifications often involve these parts, any pre-existing weaknesses could worsen with additional attachments.
Inspect all seams, stitching, and bonding areas to ensure they are secure and intact.
Also, check the inflatable’s inflation pressure and overall shape. Issues like under-inflation, over-inflation, or slow leaks could point to structural problems that could be aggravated by modifications. Test the blower and all anchoring components to confirm they are functioning correctly before proceeding with any changes.
Afterward, make sure you understand and comply with local safety requirements.
Follow Local Safety Rules
Building on your manufacturer and structural checks, confirm that your planned modifications align with local safety and insurance regulations. These rules can vary and may restrict the types of changes you’re allowed to make.
Reach out to your local building department or safety authority to determine which regulations apply to modified inflatables in your area. Some regions may require engineering approval for structural changes, while others may have restrictions on the materials you can use.
Additionally, verify with your insurance provider that your planned modifications comply with their policies.
Keep thorough records of all approvals and compliance measures. In case of an incident, you’ll need to show that your modifications adhered to all applicable safety rules and manufacturer guidelines. Be sure to document permits, inspection reports, and any correspondence with regulatory authorities as part of your safety records.
Pick and Attach Safe Add-Ons
After completing your safety assessment, the next step is to select and attach add-ons in a way that ensures they don’t compromise the structure’s integrity. Making thoughtful choices and using proper attachment techniques is key to maintaining reliable performance.
Choose Strong but Light Materials
Opt for materials that strike a balance between durability and weight. Heavy add-ons can overburden anchor points, while overly light materials may fail under stress.
Use the Right Attachment Methods
Secure attachment methods are essential for stability. Use existing anchor points like D-rings and fabric loops to evenly distribute pressure across the inflatable’s surface.
Choose wide, weather-resistant straps or ropes over sharp or abrasive materials. Tighten just enough to secure the add-ons without causing damage. Experts at Branded Canopy Tents recommend:
"Use wide, smooth ropes to avoid cutting into the material."
MVP Visuals adds:
"Do not use sharp objects or materials like rough ropes and nails as they are unsafe."
Happy Jump also advises:
"Ensure the ropes are taut but not overly tight, as some flexibility is necessary to prevent tearing or damage to the inflatable."
To achieve optimal stability, align tie-downs with both ground and anchor points [9]. For add-ons with electrical components, keep them clear of the inflatable material. LookOurWay highlights this precaution:
"Avoid direct contact with the inflatable material to prevent heat buildup."
Test How Well Add-Ons Stay in Place
Once everything is secured, it’s time to test the attachments to ensure they hold up under use.
Start by fully inflating the structure, making sure all sections are firm and properly pressurized. Then, apply pressure in different directions to check for movement, stretching, or distortion at anchor points like D-rings and fabric loops. Pay close attention to areas where straps or ropes contact the inflatable, looking for signs of wear or abrasion.
The structure should remain stable and return to its original shape without excessive movement or sagging.
To stay consistent, document your testing process and results. Create a checklist for future inspections, and test attachments before each use. Over time, factors like repeated inflation cycles and weather conditions can weaken connections, so regular testing is essential.
Anchor and Stabilize Your Modified Inflatable
Making sure your modified inflatable obstacle course is firmly anchored is essential for safe use. Once you’ve completed your attachment tests, the next step is securing it properly.
Inspect and Update Anchors Regularly
Before every use, take a close look at all anchor points and D-rings. Check for any signs of wear, such as frayed straps or damaged components. Make sure each anchor point is solid and that all D-rings are in good condition. If you spot any problems, stop using the inflatable right away and fix the issue before moving forward. Keep a record of any issues to ensure they’re addressed promptly.
Test and Check Your Modifications
Once you’ve secured all attachments and anchors, it’s time to thoroughly test your modifications to ensure the obstacle course remains safe for use. This step is critical to confirm that the structure can handle real-world conditions without compromising safety.
Do a Complete Walk-Through Check
Start by walking through the fully inflated course to inspect every connection point where new elements have been added. Pay extra attention to these areas, as they are often the first to show signs of stress or improper installation.
Carefully examine all seams near your modifications. New attachments can create tension points that weren’t part of the original design, so feel along these areas for soft spots or irregularities.
Keep an eye out for potential trip hazards. New elements might introduce unexpected edges or height differences that could cause participants to stumble. Walk the course at a normal pace, then go through it more slowly to identify any spots where someone might catch their foot or lose balance.
Lastly, check for uneven inflation around the modified sections. Soft spots caused by uneven air distribution can become dangerous, especially when multiple users are on the course at the same time.
Stress Test Modified Areas
Controlled stress testing is essential for spotting weaknesses before they turn into safety risks. Apply gentle pressure to each modified area, leaning against attachments and lightly bouncing on altered surfaces to mimic typical usage.
For climbing elements and handholds, test them with 150% of the intended load capacity. For instance, if a section is designed to hold 100 pounds, test it with 150 pounds to account for dynamic forces like jumping or swinging.
Simulate multiple users by distributing weight across modified areas. This approach helps identify stress points that might not be noticeable during single-user testing.
Pay close attention to air pressure during these tests. If modified sections cause significant pressure drops or uneven inflation under load, address these issues immediately before allowing the course to be used.
Document all findings after stress testing. This record will be invaluable for tracking performance and addressing any future concerns.
Keep Records of Changes and Checks
Maintaining detailed records of all modifications and inspections is crucial for both safety and liability purposes. Create a log that includes the date of each change, the materials used, the attachment methods, and the name of the person who performed the work.
After every use, inspect the course and log any wear, loose connections, or other concerns. Tracking trends over time can help you catch and resolve issues early. Include photos and detailed notes about modifications, test results, and any corrective actions taken.
Keep all documentation related to stress tests, such as tested weight limits, observed failures, and repairs made. These records are essential if insurance claims or liability questions arise.
Store warranty and material information for all components used in the modifications. Save receipts, installation instructions, and manufacturer specifications in one place. This not only proves helpful for insurance purposes but also ensures you’re using materials within their proper specifications.
Lastly, create a maintenance schedule tailored to your usage patterns and inspection findings. Some modifications may require weekly checks, while others might need attention only once a month. Document this schedule and track its completion to ensure nothing is overlooked, especially during busy event seasons.
After-Event Care and Cleaning
Taking care of your modified inflatable obstacles after an event is crucial for their longevity and safety. Properly removing add-ons, inspecting for damage, and cleaning them thoroughly can help prevent minor issues from turning into costly repairs.
Remove Add-Ons and Inspect for Damage
Start by fully deflating the inflatable before removing any add-ons. This makes it easier to spot any hidden tears, holes, or weak spots. Carefully detach each add-on and examine it for signs of wear and tear.
Pay special attention to high-contact areas like handholds, climbing surfaces, and entry points, as these spots often show wear first. Run your hands over these sections to check for soft spots, small punctures, or areas where the material feels thinner than normal.
Be sure to inspect:
- Seams and stitching: Look for loose threads, separated seams, or stretched stitching around modification points.
- Zippers: Test zippers to ensure they open and close smoothly.
- Air intakes and outlets: Check for any blockages or obstructions.
- Connection points: Look for loose or worn connections on add-ons.
Also, check for any moisture buildup, as damp areas can lead to mold or mildew. If you find damage, repair it immediately using the appropriate repair kits. Storing equipment with unresolved issues can worsen the problem over time.
Once the inspection and any necessary repairs are complete, move on to cleaning.
Clean and Store Equipment Properly
Use cleaning solutions recommended by the manufacturer to clean all surfaces. Avoid harsh chemicals, as they can weaken the material or cause discoloration. Focus on high-contact areas like handholds and climbing surfaces, where oils, dirt, and bacteria tend to accumulate.
After cleaning, allow the inflatable to dry completely in a shaded, well-ventilated area. Once dry, fold the inflatable loosely to prevent permanent creases, and store it in a clean, dry space. Keep it away from direct sunlight, extreme temperatures, and sharp objects. For add-ons, organize and store them separately, clearly labeling their containers for easy access.
Proper storage not only protects your equipment but also ensures it’s ready for the next event.
Consider Professional Maintenance Services
While regular cleaning and inspections can be handled in-house, professional maintenance services go a step further. They provide deep cleaning and thorough inspections, which can extend the life of your equipment and maintain safety standards. Companies like Bouncy Rentals USA offer specialized services, including detailed inspections by trained technicians and the use of commercial-grade cleaning solutions.
Scheduling professional maintenance periodically – based on how often the equipment is used and the conditions it’s exposed to – can make a big difference. These services not only help ensure safety and performance but also provide valuable documentation for insurance and liability purposes. After making repairs or modifications, having professionals verify the inflatable’s structural integrity is especially important.
Conclusion: Put Safety First in Inflatable Modifications
Making changes to inflatable obstacles can elevate event experiences, but safety must always come first. To ensure stability and protect participants, stick to manufacturer guidelines, secure every attachment, and maintain the equipment regularly.
Start every project by carefully reviewing the manufacturer’s instructions and local safety regulations. Even minor adjustments can impact the structure’s overall stability, so it’s essential to conduct a thorough safety assessment before making modifications.
When choosing materials and testing attachments, follow the guidelines to ensure the structure remains strong and reliable. Rigorous testing is what separates a safe setup from one that could pose risks.
Anchoring and stabilization are the backbone of any safe inflatable modification. Anchor points should be evenly distributed and inspected frequently, as weather and repeated use can compromise even the most durable systems. Participants rely on these anchor points to remain secure throughout the event, making their proper setup and maintenance non-negotiable.
After modifications, keep detailed records of every change, inspection, and repair. This documentation not only supports ongoing safety efforts but also simplifies future maintenance and ensures compliance with safety standards. Perform post-event inspections and cleaning to maximize the equipment’s lifespan. And when in doubt, consult the pros – companies like Bouncy Rentals USA specialize in inflatable equipment and can offer expert advice.
From the initial safety checks to post-event care, every step you take helps create a secure and enjoyable experience for participants. By following these practices, you’ll deliver inflatable modifications that are as safe as they are memorable.
FAQs
What safety guidelines should I follow when modifying inflatable obstacle courses?
When modifying inflatable obstacle courses, it’s crucial to prioritize safety. Start by adhering to ASTM F2374-22 standards, which provide guidelines for the design and modification of inflatable amusement devices. Alongside these standards, always review and follow the manufacturer’s instructions to properly secure any add-ons and maintain the structure’s stability. Once modifications are complete, thoroughly inspect the course to spot and address any potential hazards.
Additionally, ensure operators receive training on safe modification practices. This step helps keep the equipment safe and enjoyable for everyone while reducing risks during use.
What steps should I follow to safely modify an inflatable obstacle course while meeting safety and insurance requirements?
To modify an inflatable obstacle course while keeping safety and compliance in check, start by referencing the ASTM F2374-22 standard. This standard provides essential safety guidelines specifically for inflatable amusement devices. Also, take a close look at your state’s regulations – some states may require permits, inspections, or extra safety protocols before you proceed.
When it comes to insurance, double-check that your liability coverage accounts for any modifications made to inflatables. Reach out to your insurance provider to ensure your policy covers these changes. Stability is key – secure any added features properly to minimize risks and prevent accidents. Following these steps will help you maintain safety and protect your business effectively.
How can I safely test and maintain modified inflatable obstacles for long-term use?
To keep modified inflatable obstacles both safe and long-lasting, it’s crucial to prioritize regular inspections. Look closely for any tears, punctures, loose stitching, or other signs of wear and tear. Addressing these issues quickly can prevent them from getting worse. Pair this with thorough cleaning using mild soap and water, and always make sure the obstacles are completely dry afterward to avoid mold or material degradation.
Don’t forget to routinely check seams, anchors, and safety features to confirm the structure stays secure and stable while in use. Consistent maintenance not only prolongs the lifespan of your inflatable obstacles but also ensures they remain a fun and safe experience for everyone.