
Cleaning a bounce house is about more than appearances – it’s about safety, hygiene, and extending its life. Dirt, moisture, and germs can damage the material and pose health risks like mold, MRSA, or pink eye. Proper cleaning tools and techniques make maintenance easier and more effective. Following a sanitization checklist ensures no spot is missed. Here’s what you need:
- Soft-Bristle Brush: Gentle on vinyl, ideal for seams and crevices.
- Spray Bottle with Homemade Cleaning Solution: A mix of water, vinegar, and dish soap for grime and odors.
- Disinfecting Wipes (Bleach-Free): Sanitize high-touch areas like zippers and railings.
- Portable Shop Vacuum: Removes loose debris before deep cleaning.
- Broom or Handheld Dusting Brush: Clears leftover dirt from seams and corners.
- Clean Rags or Microfiber Cloths: For wiping and drying without damaging the material.
- Vinegar Solution: Natural disinfectant to eliminate mold and bacteria.
- Dish Soap: Gentle cleaner for sticky spills and stains.
- Waterproof Tarp: Protects the bounce house during cleaning and drying.
- Leaf Blower or Drying Cloths: Ensures the bounce house is completely dry before storage.
Key Tip: Always dry thoroughly before storing to prevent mold. These tools help maintain cleanliness, safety, and durability for every event.
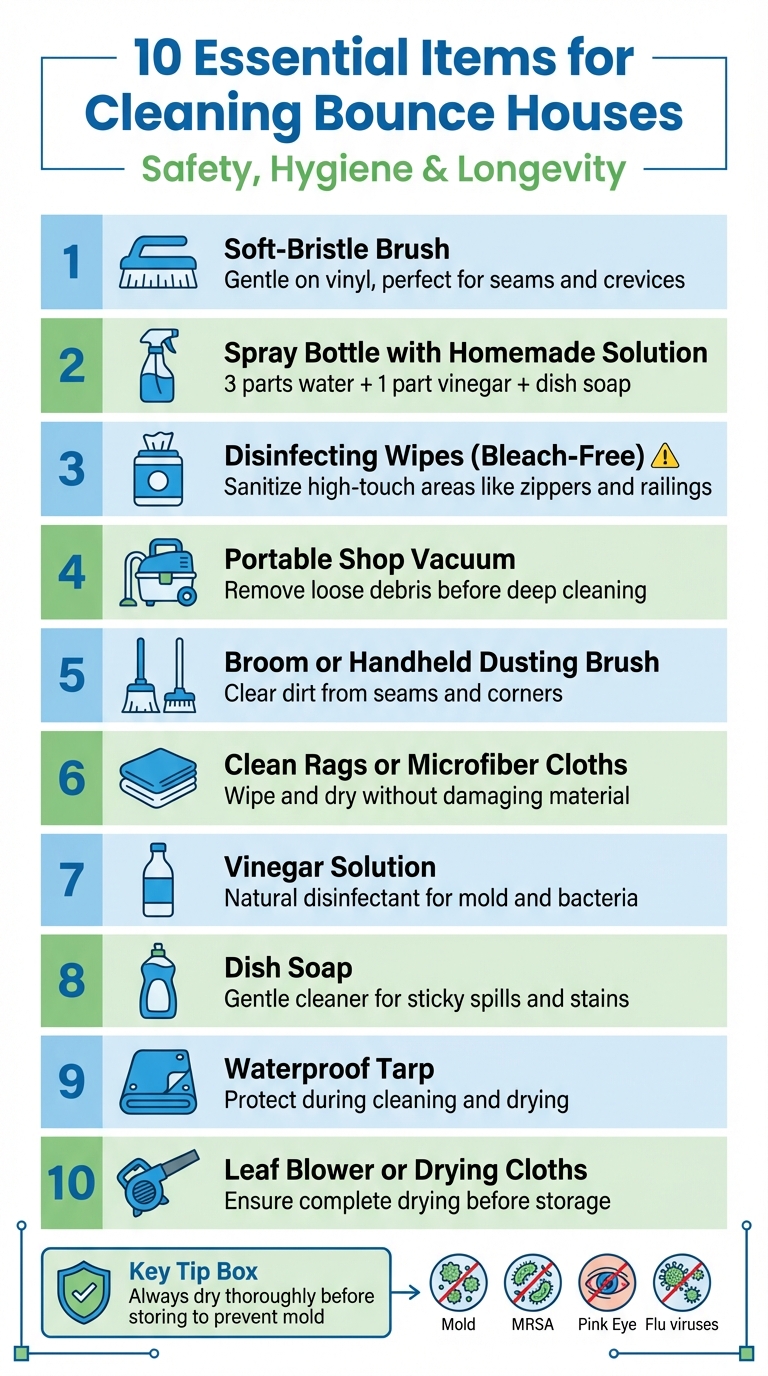
10 Essential Tools for Cleaning Bounce Houses Infographic
1. Soft-Bristle Brush
A soft-bristle brush is perfect for cleaning vinyl and nylon surfaces without causing damage. The gentle bristles ensure you avoid scratching or tearing the material. As Bounce Insider explains:
Never scrub your bounce house with a pumice stone, thick, rough bristled brushes, wire brush or steel wool. Only use soft terry cloth, paper towel or wipes. When necessary use a soft brush or old toothbrush.
The soft bristles are especially useful for reaching seams and tight crevices, where stubborn stains like dried soda or mud tend to hide. These areas, if left uncleaned, can quickly turn into breeding grounds for mold and mildew. This is one of the many reasons why regular cleaning matters for the longevity of your equipment.
Start by using the brush dry to sweep away loose debris. Then, wet the brush to apply your cleaning solution. This method prevents dirt from turning into abrasive mud, which could harm the surface.
Using the soft bristle brush is more effective [than a rag]… Scrub vigorously, but not hard enough to damage the vinyl surface.
Make sure to scrub firmly but gently to avoid any harm to the material.
For added convenience, opt for a brush with a long handle. This helps reduce arm strain, especially when cleaning larger areas. Work methodically, cleaning one panel at a time to avoid letting cleaning solutions pool in the seams. Pay extra attention to high-traffic zones like railings, and use an old toothbrush for detailed cleaning around zippers and stitching.
Next up, pair your brush with a spray bottle and a eco-friendly cleaning solutions to streamline your cleaning routine.
2. Spray Bottle with Homemade Cleaning Solution
Pair your soft-bristle brush with a spray bottle to tackle grime more effectively. A simple homemade cleaning solution works wonders for post-event messes. Here’s an easy recipe: combine three parts water with one part white vinegar, and add a few drops of bleach-free dish soap, like Dawn. This mix is gentle enough for materials like vinyl and nylon, keeping colors vibrant and the fabric intact.
"Vinegar is a natural disinfectant and, along with the degreasing properties of the dish soap, provides an excellent combination to remove grease, grime, and stains." – Thomas Dunnett, Author, The Backyard Baron
The vinegar not only disinfects but also neutralizes odors, while the dish soap cuts through stubborn residue. For tougher issues, learn how to clean mold from inflatables safely using a stronger 1:1 vinegar-water mix. Let it sit on the affected area for about two hours before scrubbing.
When using the spray bottle, focus on soiled spots, especially high-traffic areas like railings, sidewalls, or landings. Work on one section at a time, spraying the solution directly onto the surface. This prevents excess liquid from pooling in seams, which could trap moisture and lead to mold. After scrubbing, rinse thoroughly with clean water to remove any leftover residue and avoid slippery surfaces.
The spray bottle allows for precise application without overdoing it. This is a key part of the steps for cleaning bounce houses to ensure longevity. For best results, give your setup a full cleaning with this solution after every five uses or before storing it for an extended period.
To take your cleaning routine up a notch, follow up with disinfecting wipes for an extra layer of sanitation.
3. Disinfecting Wipes (Bleach-Free)
After giving your bounce house a good scrub with a mild cleaning solution, bleach-free disinfecting wipes are a quick and effective way to sanitize high-touch areas. These wipes are specially formulated to kill germs while being gentle on the vinyl or nylon material of your bounce house. Unlike bleach-based products, which can weaken the fabric, cause fading, or even lead to permanent color loss, bleach-free options keep your equipment in great condition. Avoiding harsh chemicals is one way to steer clear of common cleaning mistakes that damage vinyl.
"Disinfecting your bounce house helps prevent the spread of cold or flu viruses, MRSA, pink eye, head lice, and more." – Pogo Bounce House
Focus on areas like railings, zippers, landings, and sidewalls for fast and thorough sanitation. One of the perks of using disinfecting wipes is that they usually dry much quicker than liquid cleaners, saving you time and letting you move on to the next step without delay.
Unless the product’s instructions say otherwise, don’t rinse off the disinfectant – letting it air dry ensures maximum germ-killing effectiveness. Always double-check the label to make sure the wipes are "bleach-free" and safe for soft vinyl surfaces.
Using these wipes regularly after cleaning helps stop germs and prevent mold on bounce houses from taking hold by removing any lingering moisture from seams and folds. Finish up with a quick wipe-down to keep your bounce house fresh and ready for its next adventure. Once done, you’re ready to move on to the drying process.
4. Portable Shop Vacuum
Start by using a portable shop vacuum to clear out loose debris. This step is crucial because it eliminates dirt, grass, and sand before they mix with liquids, preventing the formation of abrasive mud. Think of it as a "dry cleaning" phase to prepare the bounce house for deeper cleaning after a party.
"A shop vacuum efficiently removes tiny dirt particles that seem innocent but can cause a lot of abrasion against the vinyl material." – Bounce Insider
By vacuuming first, you reduce the risk of debris acting like sandpaper and damaging the vinyl surface.
Make sure to use a crevice tool to clean those tricky areas like seams, pillars, and flaps. These spots are notorious for trapping moisture and organic material – like wet leaves or grass – which can lead to mold and mildew growth. Don’t overlook the underside of the bounce house or detachable components, such as slides or ladders, as debris tends to settle in every nook and cranny.
Once all the loose debris is gone, you’re ready to move on to sanitizing the bounce house with cleaning solutions.
5. Broom or Handheld Dusting Brush
After vacuuming, grab a soft-bristle broom or a handheld dusting brush to give the interior a thorough sweep. This step helps pick up any leftover debris that the vacuum might have missed. For the best results, opt for brushes with soft nylon bristles – they’re gentle yet effective at gathering dust, leaves, and grass without risking scratches on vinyl or nylon surfaces.
The type of bristles you use matters. Soft nylon bristles are perfect for cleaning vinyl and nylon because they’re tough on dirt but gentle on the material. On the other hand, steer clear of wire brushes or stiff-bristled tools, as they can easily damage the surface or ruin decorative designs.
Pay close attention to seams, corners, and areas around pillars – these spots are magnets for dirt buildup. A handheld dusting brush works wonders for reaching tight spaces, helping to clear out grit that could lead to wear or even mold growth. Just be cautious not to scrub too hard; applying too much force can harm the vinyl.
Finally, don’t forget to sweep the underside to remove any lingering moisture as part of your post-cleanup checklist before putting everything away. It’s a small step that can make a big difference in keeping your materials in good shape.
6. Clean Rags or Microfiber Cloths
When it comes to cleaning a bounce house, clean rags or microfiber cloths are your best friends. These soft materials are gentle on vinyl or nylon surfaces, making them perfect for wiping away sticky spills and mud without damaging decorative designs or seams.
Once you’ve scrubbed away the mess, drying is just as important. Dry towels are excellent for soaking up pooled water from flat areas and seams, helping to prevent mold and mildew from forming.
To make cleaning more efficient, keep two sets of cloths on hand:
- One set for scrubbing with a cleaning solution (a mix of 3 parts water to 1 part vinegar with a bit of dish soap works well).
- Another set of dry towels for wiping away any remaining residue.
This method ensures you remove all soapy residue, which could otherwise create a slippery surface. For those hard-to-reach crevices in high-touch areas, microfiber cloths are especially effective.
Skip the garden hose for rinsing. Instead, use damp towels to avoid excess moisture in the seams. As Pogo Bounce House advises:
You don’t want to spray the bounce house with a garden hose to rinse it; water getting into the seams can drastically prolong your drying time.
If the weather’s sunny, manually drying with rags can speed up the process, allowing the bounce house to air-dry in just 3 to 4 hours. Once it’s dry, you’re ready to move on to the next step , which involves following the proper steps to fold and store bounce houses in maintaining your bounce house.
7. Vinegar Solution
Using a vinegar solution is a safe and effective way to clean bounce houses. This natural disinfectant tackles germs and bacteria without relying on harsh chemicals, making it a great option for surfaces where kids play. It’s a perfect follow-up to earlier cleaning steps, offering a chemical-free way to sanitize.
The recipe is straightforward: mix three parts water with one part white vinegar. This solution works well on vinyl and nylon materials. The acidity in vinegar helps eliminate mold spores and keeps mildew at bay, while a bit of dish soap can cut through grease, grime, and sticky messes from spilled drinks like juice or soda. Thomas Dunnett, author of The Backyard Baron, highlights its effectiveness:
Vinegar is a natural disinfectant and, along with the degreasing properties of the dish soap, provides an excellent combination to remove grease, grime, and stains.
Unlike bleach, vinegar won’t fade colors or weaken the material of your bounce house. To apply, spray the solution panel by panel, taking care not to let it pool in the seams.
For mildew-prone spots, follow an enhanced cleaning method. Spray the solution on the affected area and let it sit for about two hours. Then, scrub gently with a soft-bristle brush and wipe clean with a damp cloth. Avoid using a garden hose, as excess water can seep into the seams. Finally, let the bounce house air dry completely. Inflating it in the sun for 3–5 hours is ideal before storing it away. Knowing how to fold and pack bounce houses correctly is the final step to ensuring they stay in top condition.
8. Dish Soap
Dish soap is an effective and budget-friendly option for cleaning bounce houses. It’s gentle enough to protect the vinyl and nylon materials from damage but tough enough to break down dirt, grime, and sticky messes. Unlike top cleaning agents for bounce houses that are harsh, like industrial solvents or bleach, dish soap helps maintain the bounce house’s colors and fabric while keeping it safe for kids by avoiding harmful chemical residues.
Dish soap works wonders on food spills, mud, and other stubborn residues. When mixed with water and a bit of vinegar, it creates a mild yet powerful cleaning solution that tackles debris where mold and mildew might grow. This ensures a thorough cleaning process without compromising safety.
As Pogo Bounce House advises:
You don’t need expensive vinyl cleaners. We’ll do this whole thing on the cheap, and get our bounce house just as spiffy clean as if we used those harmful chemicals!
For the best results, use a bleach-free dish soap like original Dawn. Add a few drops to your water and vinegar mix, and apply the solution with a soft-bristle brush, sponge, or microfiber cloth. Focus on areas that see the most use to keep the bounce house clean and extend its lifespan. This is especially important when you clean textured bounce houses where dirt can hide in crevices. Avoid abrasive tools like steel wool or wire brushes, as they can scratch the surface.
Once cleaned, rinse thoroughly with clean water. Instead of using a hose, wipe away residue with a damp towel to protect the seams. Make sure the bounce house is completely dry before storing it to prevent mold from forming.
9. Waterproof Tarp
After thoroughly cleaning your bounce house, it’s important to protect it during post-cleanup handling. A waterproof tarp serves as a protective layer between the inflatable and the ground, safeguarding the vinyl or nylon fabric from dirt, debris, and potential damage while you scrub and rinse. As Gary Simon from Jungle Jumps advises:
The very first step to do is to roll out your bounce house on a waterproof tarp.
This simple step not only protects the material but also makes the cleaning and drying process much smoother.
A tarp is especially useful in keeping moisture from damp ground away from the underside of the bounce house. This is crucial to prevent the growth of mold, mildew, and bacteria. Tent and Table highlights this benefit:
place a tarp on the ground first to reduce how dirty the bounce house gets
When choosing a tarp, go for one that’s larger than the bounce house’s footprint. Heavy-duty vinyl or polyethylene tarps are ideal, as they provide extra durability and resistance to water and cleaning agents. Once the cleaning is done, the tarp can also double as a clean surface for flipping the bounce house to dry its underside. You can use towels or a leaf blower to ensure it’s completely dry.
Make sure the tarp itself is clean and dry before use. This prevents any moisture, odors, or stains from transferring to the bounce house. Plus, having a clean tarp makes it easier to inspect the bounce house for hidden debris or damage after an event.
10. Leaf Blower or Drying Cloths
Once the cleaning is done and the bounce house is sanitized, the next step is making sure it’s completely dry.
Drying thoroughly is crucial to avoid mold, mildew, or stains on the vinyl. A leaf blower can be a game-changer here, as it helps remove standing water and cuts down the drying time, which would otherwise take about 3 to 4 hours naturally.
As Bounce Insider puts it:
"If you have a leaf blower handy, it can speed up both the sweeping and drying process."
Keep the bounce house inflated while using the leaf blower. This makes it easier to remove moisture from tricky spots like seams, straps, and thicker areas. To help water drain out, tilt one side of the structure and prop it up with a chair, guiding any pooled water toward the exit.
Once you’ve used the leaf blower, grab some dry microfiber towels to wipe down any remaining moisture, especially on flat surfaces and seams. Pay extra attention to seams and denser areas to ensure they are completely dry before folding and packing your unit.
Bounce Insider also emphasizes:
"Always make sure the bounce house is COMPLETELY dry before you store your bounce house… No matter how pristine it was, if you put the bounce house away while it was still wet then it could be full of filth and mold the next time you bring it out."
Conclusion
Keeping bounce houses clean isn’t just about appearances – it’s about ensuring safety and durability. Regular and thorough cleaning protects children from harmful bacteria and viruses like the flu and MRSA, while also preventing wear and tear on the vinyl material. The 10 tools and techniques outlined in this guide tackle everything from removing gritty dirt to sanitizing high-touch areas, offering a comprehensive approach to post-event maintenance.
Using the right equipment – like soft-bristle brushes, microfiber cloths, shop vacuums, and leaf blowers – helps avoid damage, preserves the vinyl’s integrity, and stops mold before it can develop. Together, these tools help maintain the quality and cleanliness you expect from Bouncy Rentals USA.
As Tent and Table aptly states:
Knowing how to clean a bounce house properly can make all the difference between children getting sick or injured, or having a great time using your rental equipment.
At Bouncy Rentals USA, we take this responsibility seriously. Every piece of equipment undergoes a thorough cleaning and inspection process, using vinyl-safe cleaning solutions and professional-grade tools. We’re committed to delivering bounce houses that are sanitized, safe, and ready for use, ensuring your guests have a fun and hygienic experience every time.
Whether it’s a birthday party, school event, or community gathering, you can count on us to provide clean, dry, and safe equipment – guaranteeing uninterrupted fun for everyone.
FAQs
How can I prevent mold from forming in a bounce house?
To keep your bounce house mold-free, always ensure it’s fully dry before putting it away. After every use, clean the surface with an appropriate cleaning solution to remove dirt and debris. Once cleaned, let it air dry completely – even a little moisture can cause mold to grow. Staying on top of regular cleaning and storing it properly will help keep your bounce house safe and ready for the next adventure.
How often should you clean a bounce house?
Keeping a bounce house clean after every use is essential for maintaining a safe and sanitary environment. Regular cleaning not only removes dirt but also helps keep germs and mold at bay, making it ready for the next fun-filled event. To do this effectively, rely on the right supplies, such as disinfectants, soft brushes, and drying tools, to ensure it stays in top-notch condition.
Is it safe to use vinegar to clean a bounce house?
Vinegar can be a handy addition to your cleaning routine for bounce houses, but it’s essential to use it the right way. Always mix vinegar with water before cleaning – straight vinegar can be too strong and might harm the vinyl or fabric. A safe starting point is a 1:1 mix of vinegar and water.
Before diving in, test your solution on a small, hidden spot to make sure it doesn’t cause discoloration or weaken the material. When cleaning, use a soft cloth or sponge to gently wipe down the surface. Afterward, rinse everything thoroughly with water to remove any leftover residue. Taking these precautions can help keep your bounce house in great shape and ready for safe, clean fun.