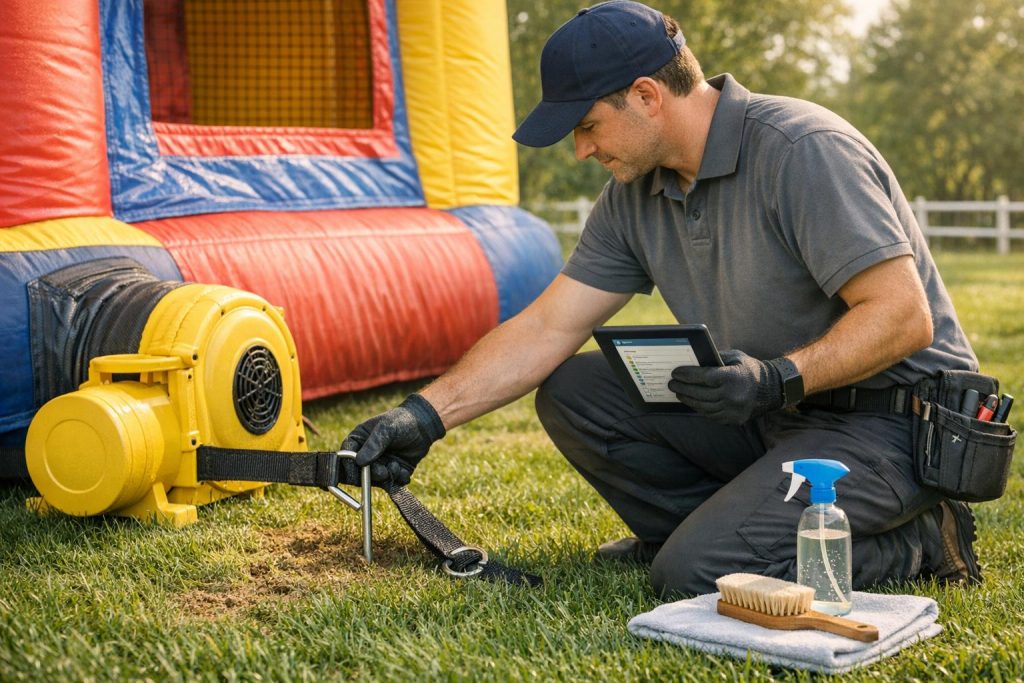
When a bounce house returns from an event, inspecting it thoroughly is critical for safety, cleanliness, and maintaining its lifespan. Here’s a quick breakdown of the process:
- Check for Visible Damage: Fully inflate the bounce house and look for tears, holes, or worn seams. Pay attention to high-stress areas like seams, anchor points, and entry/exit zones. Document any issues with photos and notes.
- Inspect Structural Parts and Anchor Points: Examine ropes, straps, stakes, and anchor connections for wear or damage. Check inflation tubes and entry points for stability. Ensure all anchoring tools are secure.
- Test Blowers and Electrical Components: Look for cracks, frayed cords, or debris in the blower. Test the blower’s performance and ensure the inflatable inflates evenly and quickly. Clean and store the blower properly after use.
- Clean and Sanitize: Sweep out debris, wash with a mild cleaning solution, and disinfect high-touch areas. Dry thoroughly to prevent mold or mildew (see our guide on removing mold from inflatables), as moisture can damage the material and pose health risks.
- Record Findings and Schedule Repairs: Log inspection details, including damage, cleaning, and repairs. Address issues immediately, and tag equipment as “out of service” if necessary. Maintain a centralized inspection log for compliance and tracking.
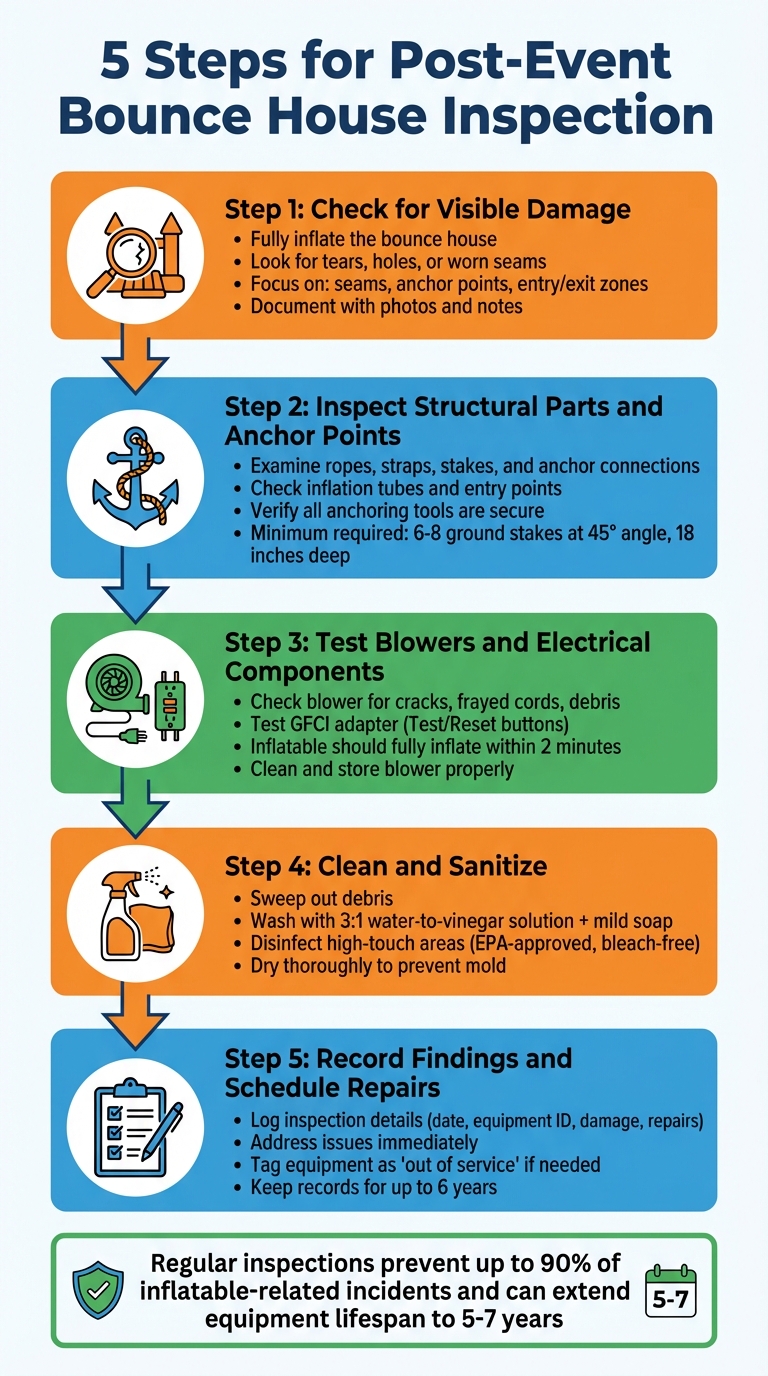
5-Step Post-Event Bounce House Inspection Process
Step 1: Check for Visible Damage
The first step in inspecting your bounce house after an event is to inflate it completely. When deflated, damage can easily go unnoticed, so it’s crucial to assess it while it’s at full pressure.
Start by walking around the unit and looking for punctures, tears, holes, or worn spots. Pay extra attention to high-stress areas like corners, entry and exit points, stairs, and the seams where different sections meet the base. For leaks that aren’t immediately visible, run your hand along the seams and fabric to feel for escaping air and potential leaks. If you suspect a leak but can’t locate it, try applying soapy water – bubbles will form where air is escaping.
Next, take a closer look at seams and anchoring points, as these areas can hide less obvious issues.
Examine all seams and stitching for loose threads, gaps, or separations. As Boris Boguslavsky, Owner of The Fun Ones, explains:
Faulty seams can be difficult to identify… we have found listening for the sound of air escaping from the seams will identify where too much air is coming out and where the seams are failing.
Additionally, inspect the anchor straps for broken stitching or torn fabric, and ensure the safety netting is securely attached without sagging or tears.
Take Photos and Notes of Damage
If you spot any damage, document it right away.
Take clear photos and write detailed notes about the damage you find, even if it seems minor. Keeping a record helps track whether a worn spot is worsening and makes it easier to plan repairs. In some areas, you’re required to keep inspection records for up to 6 years.
If you identify tears or holes, flag the equipment for repair immediately and avoid using it until the issue is fixed. Gary Simon from Jungle Jumps stresses the importance of acting quickly:
If you do detect a problem or malfunction with the equipment at any time take action immediately. Equipment that is not functioning properly should never be used.
Regular inspections and thorough documentation can help prevent up to 90% of inflatable-related incidents. This step is essential for ensuring safety and protecting your investment.
Step 2: Examine Structural Parts and Anchor Points
After checking the inflatable fabric for damage, it’s time to focus on the structural components and anchoring system. These elements are critical for ensuring the inflatable remains stable, even under heavy use.
Start by carefully inspecting all ropes, straps, and tie-downs. Look for signs of fraying, thinning, or loose seams. Pay extra attention to the areas where anchor straps connect to the inflatable’s main body – these high-stress points are prone to problems like rips, holes, or seam separation. Boris Boguslavsky, Owner of The Fun Ones, highlights a common issue:
When [a hammer strike] happens, it is possible to break strands of the anchor strap and compromise the holding strength. These straps must be removed and replaced. There is no repairing the strap.
Thoroughly checking these components ensures no critical detail is overlooked.
Next, examine the entrance and exit points, as they tend to endure the most wear and tear. Pay close attention to the seams around the step, front apron, and bed for any rips or holes. When the inflatable is fully inflated, these areas should feel firm. If they’re soft or sagging, it could indicate internal baffle damage or significant leaks. Additionally, inspect the inflation tubes and air valves to ensure they’re free of blockages, and check that the material around the connection points isn’t damaged.
Check Anchoring Tools
Once you’ve inspected the straps and attachment points, move on to the anchoring tools. Pull on each anchor point to ensure they’re secure and that no hardware has slipped or loosened. Examine metal stakes for any signs of bending or rust. If you’re using water bags or sandbags on hard surfaces, inspect them for leaks, punctures, or weakened handles.
Proper anchoring usually requires at least six to eight ground stakes. These stakes should be driven into the ground at a 45-degree angle and to a depth of at least 18 inches. Make sure to document any anchor-related issues in your inspection log. Once you’ve confirmed the structural integrity, you’re ready to move on to inspecting the inflator and electrical components.
Step 3: Inspect Blowers and Electrical Components
The blower system plays a key role in keeping your inflatable pressurized and secure, making its inspection a critical part of post-event safety. Begin by visually checking the blower housing for any cracks, dents, or debris that may have become lodged inside. Clear out obstructions like grass clippings, leaves, or dirt to ensure proper airflow.
Next, carefully examine the power cord for signs of wear, such as fraying, cuts, or exposed wires. Test the plug prongs and the GFCI adapter by pressing the "Test" and "Reset" buttons to confirm they function correctly. If these buttons fail to trip or reset as expected, the unit will need immediate repairs before it can be used again.
Ensure the inflation tube is tightly pleated around the blower and secured with a strap or clip to prevent air leaks. Check for tears or loose connections that could affect the inflatable’s performance.
Once you’ve inspected the electrical components, move on to testing the blower itself.
Test Blower Performance
Turn on the blower and observe how it performs. The inflatable should fully inflate within two minutes, and the motor should run with a smooth, steady sound. Any delays or unusual noises could point to internal problems. When everything is working properly, the inflatable should feel firm and evenly pressurized in all areas.
After testing, clean the blower’s air filter and wipe down its exterior and blades with a damp cloth. Make sure all electrical components are thoroughly dried before storing them. For storage, keep the blower off the floor in a cool, dry place, and use Velcro ties to loosely wrap the power cords to avoid damage.
Step 4: Clean and Sanitize the Bounce House
Once you’ve confirmed the blower and electrical components are in good shape, it’s time to follow a checklist for sanitizing inflatable rentals to keep your equipment in top condition. Start by inflating it on a waterproof tarp to keep it off the ground and free from additional debris. Remove any detachable parts like steps, art panels, and netting so you can clean them separately. Use a broom or vacuum to clear out loose dirt, grass, and debris from seams, corners, and crevices before introducing any cleaning solutions.
For wet cleaning, combine a solution of three parts water to one part vinegar, adding a few drops of mild, bleach-free dish soap. Use this mixture to gently scrub the vinyl surfaces, removing stains, grime, and unpleasant odors. Avoid bleach-based cleaners – they can fade colors, weaken the material, and leave harmful residues that could pose risks to children. Rinse thoroughly to eliminate any soapy residue, as leftover slipperiness can lead to accidents.
After washing, disinfect high-touch areas like entrances, railings, and landing zones using an EPA-approved, bleach-free disinfectant. These professional-grade disinfectants are designed to eliminate 99.9% of germs, bacteria, and viruses. Allow the disinfectant to sit for about 10 minutes, following the instructions on the label.
Drying the bounce house thoroughly is critical to prevent mold and mildew. Keep the inflatable fully inflated until every surface is completely dry, especially in seams and crevices where moisture tends to linger. Use tools like leaf blowers or microfiber towels to speed up the drying process, then let the unit air dry in the sun. While sunlight helps with evaporation, it doesn’t replace the need for proper chemical disinfection. Never store or deflate the bounce house while it is still damp.
These steps ensure your bounce house stays clean, safe, and ready for action at the next event.
Choose Safe Cleaning Products
The cleaning products you choose play a big role in protecting both the bounce house and its users. Opt for trusted commercial cleaners like Simple Green Pro D 5, Simple Green Pro D 3, or Lysol Bleach-Free Wipes for effective results. To safeguard against UV damage, consider applying a product like Dynamite Vinyl Shine. Stay away from abrasive cleaners, solvents, petroleum-based products, and bathroom cleaners, as they can damage the vinyl and weaken the inflatable’s structure. Always follow the manufacturer’s dilution instructions for concentrated cleaners and test new products on a small, hidden area before full application.
Step 5: Record Findings and Schedule Repairs
Once you’ve finished inspecting and cleaning, it’s time to document everything and plan for any necessary repairs.
Start by recording key details like the date, equipment ID, inspector’s name, and a clear description of any damage found – such as tears, punctures, or worn areas. Take detailed photos, especially of high-stress spots. Your report should also cover the condition of anchor points, straps, D-rings, stakes, blower performance, and all safety features (like safety netting, tags, zippers, Velcro, and deflation valves). Don’t forget to note any cleaning or minor fixes you’ve already completed.
Keeping accurate records makes it easier to decide on repairs and prioritize safety-critical issues. Minor damage, like small punctures or surface tears, can often be fixed on-site using vinyl tape or patch kits. For more serious problems, such as internal damage or blower motor issues, schedule professional repairs. Any equipment that’s not in working condition should be tagged as “out of service” immediately to avoid accidents. Regular maintenance is crucial – it can prevent up to 90% of inflatable-related incidents. With consistent care, your commercial bounce house can last between 5 and 7 years.
Keep an Inspection Log
In addition to your on-site notes, maintain a centralized log to track the ongoing condition of your equipment. Include inspection dates, findings, completed repairs, and any environmental factors that could affect wear and tear, like extreme weather or high UV exposure. This log not only helps you monitor equipment longevity but also ensures compliance with state regulations. Many states require an annual operating permit for inflatables, which usually costs around $200.
In some areas, you’ll need to keep inspection records for up to six years. These logs are also invaluable for safety certifications and insurance reviews.
"Regular maintenance isn’t just about keeping your bounce house clean – it’s about ensuring the safety of children and protecting your investment." – Henry, Industry Expert, Bounce Horizon
Conclusion
Performing thorough inspections – from checking for visible damage to reviewing the anchoring system – ensures both safety and durability. Post-event inspections are especially important for catching minor issues like small tears or worn anchor points before they escalate into serious hazards. Staying consistent with these steps helps maintain equipment performance over time.
This preventive approach not only reduces risks but also cuts down on expensive repairs, potentially extending the lifespan of your equipment to 5–7 years. With the inflatable amusement industry valued at around $4 billion in 2023, regular inspections protect both the children who use the equipment and your business’s financial health. Keeping detailed logs of inspections provides a record of equipment performance, offers liability protection and licensing compliance, and showcases your dedication to safety.
Routine checks and proper documentation do more than safeguard guests – they also protect your investment. Addressing issues right after each rental prevents costly emergency repairs and last-minute equipment failures, while reinforcing your reputation for dependability and safety. Over time, your team will become efficient at these inspections, ensuring every inflatable is clean, secure, and ready for the next event. This includes knowing how to fold and pack units properly to prevent damage during storage.
At Bouncy Rentals USA, we’re committed to rigorous inspection processes, guaranteeing that every bounce house is safe, clean, and prepared to make your next event unforgettable.
FAQs
How often should I do a full post-event inspection?
After every use, it’s crucial to conduct a thorough post-event inspection. Look for any signs of damage, tears, or wear. Ensure all components are intact and give everything a proper cleaning. This helps maintain both safety and the equipment’s lifespan.
When is damage serious enough to tag it “out of service”?
A bounce house must be marked as “out of service” if it has any major tears, holes, or structural damage that could compromise safety. This includes issues like damaged seams or missing components that need to be repaired or replaced before the bounce house can be safely used again.
What’s the safest way to dry a bounce house fast?
The best way to dry a bounce house quickly – especially after it’s been used with water – is to follow steps that keep it safe and in good condition. Tools like leaf blowers can help speed up the drying process, while microfiber towels are great for soaking up any remaining moisture. Make sure the bounce house is completely dry before storing or using it again. This prevents mold, protects the material, and avoids slippery surfaces during play, all while helping the bounce house last longer.