Setting up and taking down a bounce house involves more than inflating and deflating – it’s about safety, efficiency, and protecting your equipment. Here’s a quick guide to ensure a smooth process:
- Site Prep: Choose a flat, clear area with enough space and no overhead hazards. Use stakes for grass or sandbags for hard surfaces.
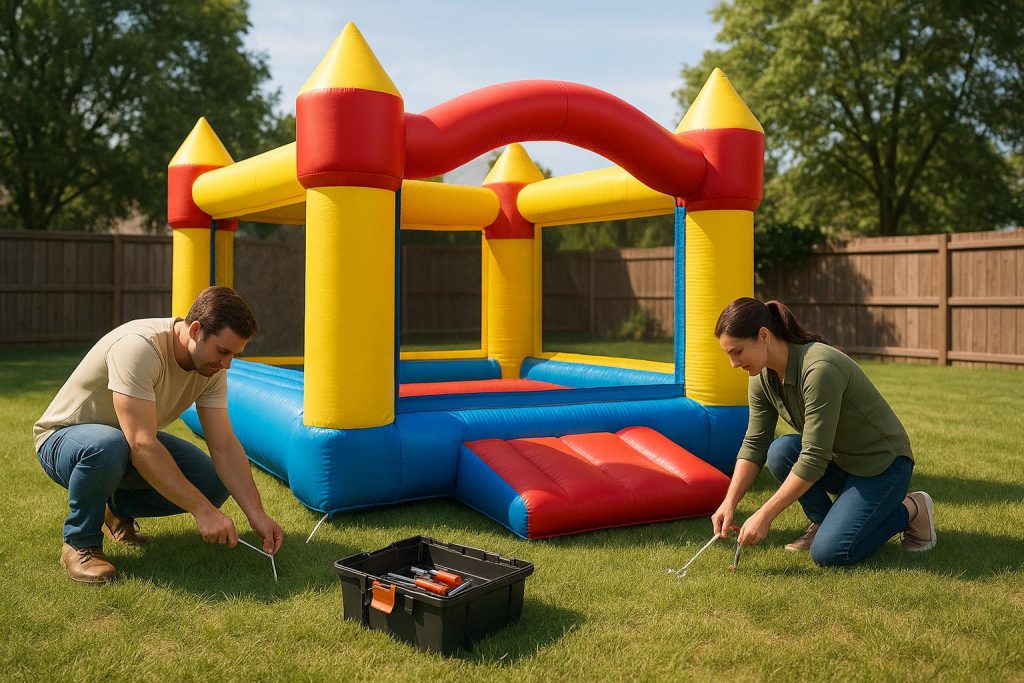
- Setup: Lay a tarp, unfold the bounce house, and securely attach the blower. Anchor the unit firmly and perform a safety inspection.
- During Use: Set weight limits, group participants by size, enforce rules, and provide adult supervision at all times.
- Takedown: Deflate, clean, dry, and roll the bounce house. Store it in a dry, climate-controlled area to prevent damage.
Follow these steps to keep events safe and equipment in good condition for years to come.
Site Preparation and Inspection
Before setting up, ensure the area meets the required size and provides enough space for safe operation.
Inspect the Event Site
Start by checking that the ground is stable and free of obstructions. Grass is ideal because it allows for stake anchoring and offers some natural cushioning. If you’re working on hard surfaces like concrete or asphalt, you’ll need sandbags or weighted anchors instead. Once the ground is cleared, don’t forget to look up and assess the area above for potential hazards.
Check Overhead and Surrounding Clearance
Since bounce houses are typically around 16 feet tall, they require plenty of vertical clearance for safe use. Look for any low-hanging branches, power lines, or nearby structures that could pose a risk. Avoid setting up under electrical wires to eliminate safety concerns.
As a general guideline, leave an open space around the bounce house equal to half its height on all sides. For example, a unit standing 15 to 16 feet tall should have at least 7.5 to 8 feet of clearance around its perimeter.
Identify Ground Anchoring Points
After confirming the site and overhead safety, focus on securing the bounce house. On grassy surfaces, stakes are a reliable option for anchoring. For harder surfaces like asphalt or concrete, you’ll need to switch to sandbags or weighted anchors, as stakes won’t be effective. Choose the anchoring method that works best for the specific conditions of your setup area.
Setup Checklist
With your site ready and key points identified, it’s time to start the setup process. Following these steps in order will help ensure everything goes smoothly and avoid common mistakes.
Prepare the Bounce House for Inflation
Begin by placing a protective tarp on the ground where the bounce house will sit. This tarp acts as a barrier, shielding the inflatable’s bottom from moisture, dirt, and any sharp surfaces that could cause damage. Once the tarp is in place, unfold the bounce house on top of it, making sure it’s aligned with your event layout.
Position the entrance to face the direction where guests will approach. Smooth out any wrinkles and clear away debris from the surface before you begin inflation. Then, attach the blower securely to the bounce house to prepare for inflation.
Connect and Secure the Blower
After positioning the bounce house, focus on connecting the inflation system. Locate the air port, which is usually found at the back or sides of the inflatable. Unroll the inflation tube and ensure it’s free of twists, kinks, or debris.
Slide the inflation tube snugly over the blower nozzle to create a tight seal. Use straps or bungee cords to secure the connection, making sure the tube is firmly in place but without over-tightening to avoid damaging the blower nozzle.
Place the blower on a stable, dry surface at least 3 feet away from the bounce house walls to prevent overheating. If the ground is wet, use a tarp under the blower. Position the blower so its air vents face outward for proper ventilation.
Close all other air outlets, including Velcro or zipper compartments. For unused ports, tie them off but leave a slight opening to allow minimal air release, which helps prevent over-pressurization.
For power, connect the blower to a dedicated 20 AMP outlet. Avoid using GFCI outlets and ensure the power source is within 50 feet of the setup location. If an extension cord is needed, use a 12-gauge cord no longer than 50 feet.
Anchor the Bounce House
As the bounce house inflates, secure it using the manufacturer’s recommended anchors for your surface type. On grass, drive stakes through the designated anchor points at a 45-degree angle away from the inflatable. This ensures better resistance to wind and movement. For concrete or asphalt, use sandbags or weighted anchors at each anchor point, following the manufacturer’s weight guidelines.
Double-check that all anchors are secure before fully inflating the bounce house. Test each anchor by applying light pressure to confirm it stays in place and won’t loosen during use.
Conduct Final Safety Inspection
Once the bounce house is fully inflated, perform a thorough safety check. Walk around the perimeter, checking for any air leaks by listening and feeling along seams and connection points.
Make sure the bounce house holds its proper shape and firmness. The walls should feel firm but flexible, and the bouncing surface should have some give when pressed. Confirm that all safety features – like entrance ramps, safety nets, and protective barriers – are properly inflated and in position.
Secure the blower cord to keep it out of foot traffic, reducing the risk of tripping hazards. Finally, ensure the bounce house is level and stable on its foundation before declaring it ready for use.
Safety Guidelines During Use
Once your bounce house is set up and inspected, it’s time to focus on maintaining safety while it’s in use. Below are some key guidelines to ensure everyone has a safe and enjoyable experience.
Set Capacity and Usage Rules
Start by setting clear capacity limits before anyone enters the bounce house. Stick to the weight and occupancy guidelines provided by the manufacturer – these are not just recommendations but crucial for preventing structural strain and minimizing collision risks.
To further reduce the chances of injuries, group participants by age and size. For example, avoid mixing a 4-year-old with a 12-year-old in the same session. This simple step can significantly lower the risk of accidents.
Establish and communicate a set of rules to all participants beforehand. Commonly prohibited activities include:
- Wearing shoes or sharp objects like glasses or jewelry
- Flipping, wrestling, or roughhousing
- Climbing on walls or netting
Post these rules at the entrance and review them with each group to ensure everyone understands. For larger gatherings, set time limits – around 5 minutes per group works well – to rotate participants efficiently. Always clear the bounce house completely before allowing the next group to enter.
Once these rules are in place, active supervision becomes essential to enforce them.
Ensure Adult Supervision
There must always be an adult supervising the bounce house when it’s in use. This person should remain focused – avoid distractions like cell phones or long conversations. Ideally, the supervisor should stand near the entrance to monitor activity and enforce the rules.
Keep an eye out for signs of fatigue, overheating, or unsafe behavior among the kids. To prevent dehydration, set up a water station nearby and encourage regular breaks.
Be prepared for emergencies by having a first aid kit on hand, knowing where the nearest phone is, and having a plan for quick deflation if needed. If the bounce house starts to deflate, remove all children immediately.
Weather and Surface Safety Considerations
Environmental factors can greatly affect bounce house safety. Continuously monitor wind speeds – if winds exceed 15 mph, deflate the bounce house immediately. Even moderate winds can destabilize inflatables, creating a serious hazard.
Rain is another concern. It can make surfaces slippery and interfere with the blower system. At the first sign of rain, clear everyone out and deflate the bounce house. Also, ensure the area around the bounce house is free of debris, toys, or obstacles to allow for safe entry and exit.
Encourage safe bouncing habits, like landing on feet and avoiding physical contact like tackling or pushing. Food and drinks should also be kept out of the bounce house to maintain cleanliness and prevent accidents.
Takedown and Storage Checklist
After enjoying your inflatable, proper takedown and storage are crucial to keep it in excellent condition for future use. Following these steps will help safeguard your investment and extend the life of the bounce house.
Deflate the Bounce House
Start by making sure the bounce house is completely empty. Take a walk around the unit to check for any forgotten items like toys, shoes, or personal belongings before beginning the deflation process.
Turn off and unplug the blower to stop the airflow. Locate the deflation vents or zippers, which are usually positioned at the base or sides of the inflatable. Open these vents to allow air to escape quickly and efficiently.
Deflating the bounce house typically takes about 10 minutes. During this time, you can gently press down on different sections to help push the air out. Be careful not to use sharp objects or apply excessive force, as this could damage the material.
Clean and Dry the Inflatable
While the inflatable is still slightly inflated, begin cleaning it. Remove any visible dirt or debris using mild soap, warm water, and a soft cloth. Avoid harsh chemicals or abrasive cleaners, as these can harm the vinyl or fabric.
Focus on high-use areas such as the entrance, bouncing surface, and any slides or obstacles. Once cleaned, rinse thoroughly with clean water to ensure no soap residue remains. Leftover soap can attract dirt or leave the surface sticky over time.
Before storing, make sure the inflatable is completely dry. Even a small amount of trapped moisture can lead to mold, mildew, or material damage. Let the inflatable air dry in a shaded area to avoid direct sunlight, which can weaken the material. Use clean towels to wipe down any remaining moisture, especially in seams, crevices, and corners where water tends to collect.
Fold and Store the Bounce House
Once the bounce house is fully deflated, cleaned, and dried, it’s time to fold and store it properly. Depending on the size of the inflatable, this process typically takes 5–15 minutes.
Instead of folding, consider rolling the bounce house to avoid creases that could lead to weak spots or holes. Lay the unit flat, smooth out any air pockets, and fold the sides inward to form a rectangle.
Begin rolling from one end, keeping the roll tight and even while pressing out any remaining air. This method not only saves storage space but also helps prevent permanent creases.
Secure the rolled inflatable with the straps or ties provided, then place it in the designated storage bag or container. Ensure it fits comfortably without forcing or cramming the material, which could cause damage.
Store the bounce house in a climate-controlled area, away from extreme temperatures, direct sunlight, and moisture. This ensures it stays in great shape and ready for your next event.
Maintenance and Care Tips
Taking care of your bounce house doesn’t just keep it safe – it also helps it last longer. Proper maintenance ensures it performs well and stays in good condition for years to come.
Inspect for Damage
Make it a habit to inspect your bounce house both before and after each use. This helps you catch any issues early on. Look for rips, holes, or discoloration on the exterior – faded colors can signal that the material is weakening.
Pay close attention to the seams and stitching, as these areas endure the most stress during use. Watch for loose stitches, separations, or other signs of wear and tear. Don’t forget to check the anchor points and netting for fraying or other weaknesses.
High-traffic areas, like entrances and bouncing surfaces, are especially prone to wear, so give them an extra look. Also, keep an eye out for mildew or mold, which could indicate moisture issues that need to be addressed right away.
The inflation system needs regular testing to ensure it’s working properly. Suspect a leak? Inflate the bounce house fully and apply soapy water to the surface – bubbles will show you where air is escaping. Listen closely for hissing sounds, too. After any repairs, re-inflate the bounce house and monitor the patched area for several hours to ensure the fix holds.
Sanitize After Each Use
Cleaning your bounce house after every use isn’t just about hygiene – it also helps protect the material from breaking down over time.
Start by rolling it out and inflating it fully. If it’s damp, let it air dry completely before cleaning. Use a shop vacuum to remove dirt, debris, and any loose items from inside.
For cleaning, use a diluted solution like Simple Green or a vinegar-based mix to wipe down all surfaces. After that, apply a disinfectant spray and let it sit for the recommended time on the label. This ensures proper sanitation. Alternatively, you can use bleach-free disinfectant wipes for high-touch areas like zippers, railings, and landings.
Store Properly in a Climate-Controlled Area
Before putting your bounce house away, make sure it’s completely dry to avoid mold and mildew. Store it in a climate-controlled space, away from extreme temperatures, direct sunlight, and moisture, to keep it in top condition.
Conclusion
Following this checklist ensures your bounce house is set up, used, and taken down with safety and fun in mind. The foundation of a successful bounce house experience rests on three critical steps: proper setup, constant safety monitoring, and careful takedown.
Key tasks like checking ground clearance, securing anchor points, and performing a final safety inspection play a vital role in preventing accidents and protecting the equipment. Every step on this list is designed to keep your event running smoothly.
Don’t forget that care doesn’t stop after the event ends. Post-event maintenance is essential to keep your bounce house in great condition for future use. With proper care, your bounce house can provide years of enjoyment.
If you want to leave the heavy lifting to the professionals, Bouncy Rentals USA has you covered. From delivery and site inspection to setup and takedown, our experienced team ensures everything is handled safely and efficiently. We take care of the details so you can focus on making memories at your event.
FAQs
What should I do if the bounce house starts deflating unexpectedly during use?
If the bounce house starts to deflate unexpectedly, the first step is to turn off the blower right away to avoid causing more damage. Next, check for common problems such as disconnected blower tubes, power outages, or blockages in the air intake. Carefully inspect the bounce house for any visible tears or leaks. For smaller leaks that might not be obvious, use soapy water to check seams or valves – bubbles will reveal the problem spots.
Should you find a tear or leak, try to patch it using a repair kit if you have one on hand. However, if the issue can’t be resolved immediately or the blower isn’t working correctly, it’s best to stop using the bounce house. Safely deflate it by gently pressing the air out, starting from the far end. Safety should always come first, so don’t hesitate to contact your rental provider, like Bouncy Rentals USA, for help or to arrange for replacement equipment.
How do I keep a bounce house safe and secure in windy weather?
To ensure a bounce house remains safe in windy conditions, make sure wind speeds are no higher than 15-20 mph before setting it up. Secure the structure firmly with strong stakes or heavy-duty sandbags, and double-check that all tie-downs are properly tightened. Stay updated on the weather forecast and avoid using the bounce house during storms or when strong gusts are expected. Prioritizing safety is key!
What are the best ways to clean and maintain a bounce house for long-term use?
To keep your bounce house in tip-top shape for years of enjoyment, make cleaning a priority after every use. Simply mix some mild soap with warm water, gently wipe down the surface, and rinse off any soap residue thoroughly. Once cleaned, allow it to air dry completely before packing it away. This simple step helps prevent mold and mildew from taking hold.
It’s also a good idea to inspect your bounce house regularly for small tears or any signs of damage. Addressing these issues quickly can stop them from getting worse. When it comes to storage, choose a cool, dry spot that’s out of direct sunlight and away from extreme temperatures to preserve the material. Steer clear of harsh chemicals during cleaning, as they can weaken the fabric and shorten its lifespan. With a little care and attention, your bounce house will be ready to bring fun to event after event!