Storing inflatables properly during winter is critical to prevent damage and extend their lifespan. Cold temperatures, moisture, and improper storage can lead to mold, cracks, and weakened materials, resulting in higher repair costs and safety risks. Here’s how to keep your inflatables in great shape until spring:
- Inspect and Clean: Check for damage, clean with mild soap, and dry thoroughly to prevent mold and odors.
- Dry Completely: Ensure no moisture is left before storing to avoid bacterial growth and material degradation.
- Pack Carefully: Use breathable storage bags, fold or roll inflatables properly, and avoid creating new creases.
- Choose the Right Environment: Store in a dry, temperature-controlled space above 40°F with low humidity and good ventilation.
- Monitor and Maintain: Conduct monthly inspections to check for pests, moisture, or shifting inventory.
Proper winter storage can double the lifespan of your inflatables and reduce repair costs by up to 50%. Follow these steps to protect your investment and ensure your inflatables are ready for action when warmer weather returns.
Pre-Storage Inspection and Cleaning
Getting your inflatable ready for winter starts with a careful inspection and a deep cleaning. These steps are essential to avoid potential damage and ensure it’s in good shape for future use.
Check for Damage
Lay your deflated inflatable on a clean, flat surface and give it a detailed inspection. Pay close attention to areas that experience heavy use or stress.
Start with the seams and stitching. Carefully check each seam by hand for loose threads, gaps, or weak spots where the vinyl panels connect. Corners and junctions between sections are particularly vulnerable, so inspect these areas thoroughly.
Next, examine the valve systems. Test the valves and check the blower to ensure everything is functioning properly. If the blower filter is dirty, clean or replace it – clogged filters can hurt performance when you need the inflatable again. Also, look for signs of corrosion or wear on metal components, and if the blower shows damage or operates poorly, consider having it serviced.
Document any issues you find. Take photos and note the date of your inspection. These records can help you track recurring problems and might even be useful for insurance claims.
Deep Cleaning Steps
Once the inspection is done, it’s time to clean. A proper cleaning routine not only keeps your inflatable looking good but also helps prevent mold, mildew, and bacteria that can degrade the vinyl.
Set up on a clean, non-porous surface like a tarp or pallet. Avoid concrete floors, as they can trap moisture and transfer it to your inflatable.
- Prepare a cleaning solution with mild soap and water. Skip harsh chemicals or abrasive tools that might harm the vinyl. A soft brush or cloth works best for scrubbing, especially around seams, folds, and any visibly dirty areas.
- Rinse thoroughly to remove all soap residue. Leftover soap can trap moisture, encouraging mold growth.
- For stubborn stains, a mild bleach solution (1 part bleach to 10 parts water) can be used, but make sure to rinse extra thoroughly afterward.
After cleaning, focus on drying. Place the inflatable in a well-ventilated area with indirect sunlight. Open all valves and access points to release trapped moisture. For larger inflatables, gently move sections around to ensure airflow reaches every part. Depending on size and conditions, drying can take 24–48 hours. Do not fold or store the inflatable until it is completely dry – even a small amount of moisture can lead to mold, odors, and bacterial growth.
Apply Mold Prevention Treatments
Once the inflatable is fully dry, apply a mold prevention spray evenly, following the manufacturer’s instructions. Products like 303 UV Protectant can also help maintain the material’s flexibility and reduce the risk of shrinking or leaks.
Start this entire process well before freezing temperatures hit – ideally 2–4 weeks in advance. This ensures you have enough time to properly prepare and protect your inflatable for storage.
Drying and Preparing Inflatables for Storage
After thoroughly cleaning your inflatable, the next step is to ensure it’s completely dry. Even the smallest amount of moisture can lead to mold, mildew, or lasting damage.
Remove All Moisture
Drying requires careful attention to detail. Start by wiping down every surface, paying close attention to seams, creases, and valves, using an absorbent towel. For hard-to-reach areas, set up fans to keep air circulating. Position the fans strategically to ensure airflow reaches every corner.
Avoid using heat sources like hair dryers, as they can make the vinyl brittle. Depending on the size of the inflatable, drying can take anywhere from 24 to 48 hours, with larger units potentially needing up to 72 hours. For stubborn moisture, periodically reposition different sections to improve airflow.
Keep in mind that cold weather can make vinyl and other inflatable materials stiff and more likely to crack. To speed up the drying process, many commercial inflatable rental companies, like Bouncy Rentals USA, rely on fans and climate-controlled drying areas. These controlled environments ensure inflatables are completely dry and ready for winter storage, preserving their quality for the next season.
Best Storage Environment
Once your inflatable is completely dry, the next priority is creating the right storage environment. Proper storage conditions are key to maintaining your inflatable’s durability.
| Storage Condition | Ideal Condition | Why It Matters |
|---|---|---|
| Temperature | Above 40°F | Prevents stiffening and cracking |
| Humidity | Below 50% | Reduces risk of mold and mildew |
| Ventilation | Good airflow | Maintains material flexibility |
| Location | Clean, dry, elevated | Protects from moisture and pests |
Temperature control is crucial. If the storage area drops below 40°F, the vinyl may stiffen and crack when handled. Ideal options include heated garages, finished basements, or climate-controlled storage units.
Humidity management is equally important. High humidity encourages mold and bacterial growth, so use a hygrometer to monitor levels. If the humidity exceeds 50%, consider using a dehumidifier or moving the inflatable to a drier location.
Avoid damp storage spaces like unfinished basements, leaky sheds, or flood-prone areas. Such environments can accelerate material degradation and create ideal conditions for mold.
Good air circulation is another key factor. Proper ventilation – through windows, vents, or periodic fan use – prevents stagnant air and helps keep the material flexible.
Commercial rental companies often store inflatables in climate-controlled warehouses to prevent stiffening and mold, especially in regions with harsh winters. While this may require some investment, it significantly extends the lifespan of your equipment and reduces replacement costs.
Lastly, elevate your inflatable off the ground by using pallets or shelving. This prevents moisture from seeping in from concrete floors and allows for better airflow underneath.
Once you’ve ensured the storage environment is ideal, the next step is folding and packing your inflatable to keep it in top condition.
Folding, Rolling, and Packing Inflatables
Taking the time to fold and roll your inflatables properly can ensure they remain in great shape during winter storage. Once your inflatable is completely dry, how you handle it during packing can mean the difference between pulling it out in perfect condition next spring or dealing with expensive repairs. Using the right techniques helps prevent stress points and creases that might weaken the vinyl over time.
Folding vs. Rolling Methods
The best packing method depends on the size and design of your inflatable. Larger units, like bounce houses and obstacle courses, are better suited for rolling, while smaller items, such as water slides or simpler bouncers, are easier to fold.
For rolling, start at the top and work your way down, systematically pressing out air as you go. This prevents creases and reduces the risk of material damage. Keep the roll tight but not overly compressed to avoid unnecessary stress.
When folding smaller inflatables, try to follow the original fold lines provided by the manufacturer. These lines are designed to handle repeated folding without damaging the material. Creating new folds can weaken the inflatable over time, so sticking to the original creases is key.
If your inflatable has multiple chambers or a complex design, deflate each section gradually instead of all at once. This method keeps the material from bunching up awkwardly and minimizes stress on the seams.
Use Storage Bags
Investing in high-quality storage bags is an easy way to protect your inflatables from dust, debris, and moisture. These bags act as a barrier against environmental damage during the off-season.
Look for bags made from breathable materials that allow air circulation while keeping moisture out. Completely sealed plastic bags can trap humidity, which might lead to mold if any residual moisture remains on the inflatable.
Choose a storage bag that’s slightly larger than the folded inflatable. A bag that’s too small can create pressure points and permanent creases, so ensure there’s enough room for the inflatable to fit comfortably with a bit of extra space. Commercial-grade vinyl bags are a great option – they’re durable and resistant to tears or punctures, offering long-term protection.
Before placing the inflatable in the bag, inspect it one last time for sharp objects or debris that might have been missed during cleaning. Even tiny items like twigs or stones can cause punctures over time, so it’s worth the extra check.
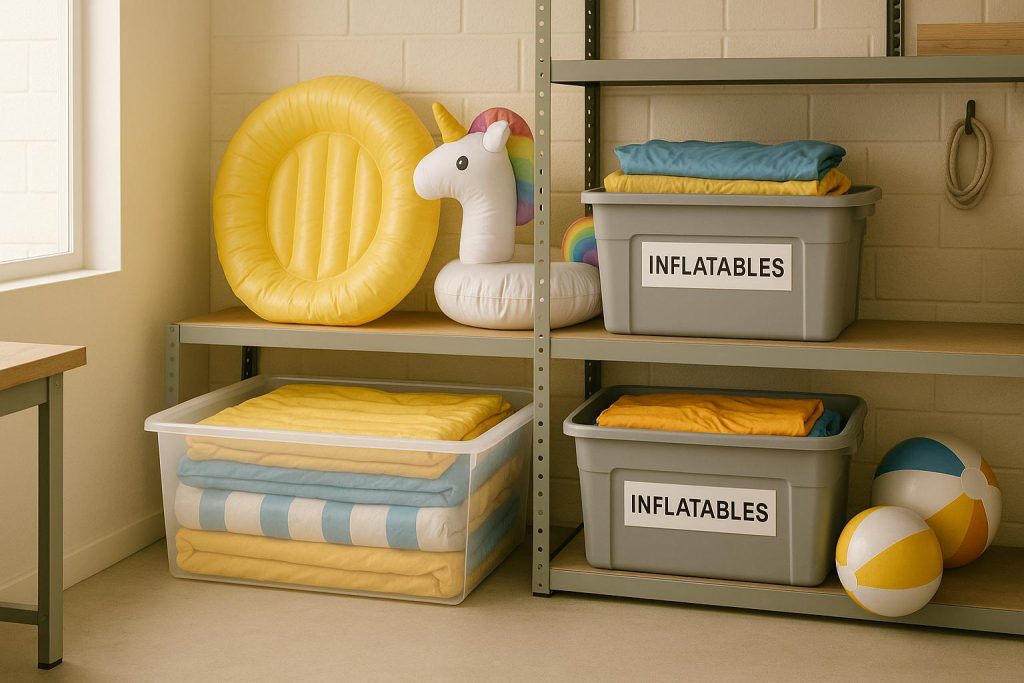
Label and Organize Your Inventory
Once your inflatables are packed, proper labeling and organization can save you a lot of headaches when it’s time to set up again in the spring. Use waterproof tags or permanent markers to label each bag with essential details, like "15ft Bounce House – Stored 11/15/2025." Clear labeling helps minimize unnecessary handling, which can lead to wear and tear.
Organize your storage space by grouping items based on type or frequency of use. For example, keep your most popular units in easily accessible spots, while seasonal or less frequently used items can be stored further back. If you need to stack items, avoid placing heavy ones on top of inflatables to prevent compression marks. Use padding between layers for added protection.
A company like Bouncy Rentals USA sets a great example. After every event, they clean, dry, and inspect their inflatables. Larger units are rolled with the help of multiple staff members to ensure even pressure, then packed into labeled, commercial-grade vinyl bags. These bags are stored on elevated shelves in a climate-controlled warehouse, and their inventory logs are updated after each use. This process has significantly reduced repairs and extended the lifespan of their equipment.
Maintaining an inventory log – whether digital or written – can be a game-changer during busy seasons. Include details like storage locations, condition notes, and any needed repairs. This way, you won’t have to disturb properly stored items while searching for specific inflatables.
To keep your inventory in top shape, consider a rotation schedule. Prioritize inflatables that haven’t been used in a season for early bookings, while frequently rented items can be rotated later. This approach ensures even wear across your collection and helps extend the life of all your equipment.
Choose the Right Storage Location
Once your inflatables are cleaned, dried, and packed, the next step is finding the right storage spot. The ideal location should have a stable temperature above 40°F, humidity levels below 50%, and be free from pests. Avoid areas where temperatures drop below 32°F, as freezing conditions can damage the material. Decide whether indoor or outdoor storage best suits these requirements.
Indoor vs. Outdoor Storage
Indoor storage is often the better choice, especially if you have access to a clean, dry, and temperature-controlled space like a garage, basement, or a climate-controlled storage unit. These options provide consistent conditions, shield your inflatables from the weather, and make it easier to check on them regularly. However, if you’re using a garage or basement, ensure the area stays dry, ventilated, and pest-free. Climate-controlled units offer the best protection but come with the downside of added monthly costs.
If indoor storage isn’t feasible, outdoor storage can work with extra care. Cover your inflatables with UV-resistant tarps and keep them elevated to protect against temperature shifts, moisture, and pests. Rodents, especially mice, are drawn to PVC materials, so take steps to block their access [6]. For smaller inflatables, rolling them up and storing them in large plastic garbage cans adds another layer of protection.
| Location Type | Pros | Cons |
|---|---|---|
| Indoor (Garage/Basement) | Stable temperature, weather protection, easy access | May require pest control and has space limitations |
| Climate-Controlled Unit | Best temperature and humidity control, maximum protection | Higher monthly costs |
| Outdoor (with Cover) | Saves indoor space, cost-effective | Higher risk of moisture, pests, UV damage, and temperature fluctuations |
Keep Inflatables Off the Ground
Storing inflatables directly on concrete or bare ground can cause moisture to collect, leading to material damage like mold or mildew. To prevent this, elevate your inflatables.
Pallets are an affordable and practical solution, providing good air circulation underneath. Plastic pallets are particularly useful since they resist moisture better than wooden ones. For smaller inflatables, shelving systems can help you stay organized while keeping items off the ground. Just ensure the shelves are sturdy enough to handle the weight.
For larger inflatables that don’t fit on shelves, consider using rolling bins or large storage containers. These not only keep the inflatables elevated but also protect them from dust and pests. Proper air circulation beneath your stored items is key to avoiding moisture buildup and makes routine inspections much easier.
Winter Maintenance and Monitoring
Even with the best storage setup, keeping your inflatables in top shape during winter requires regular upkeep. Monitoring their condition throughout the season is key to ensuring they’re ready to go when spring rolls around. Storage alone isn’t foolproof – issues can develop over time, so consistent checks are a must to protect your investment.
Monthly Inspections
Set aside a specific date each month for inspections. These routine checks can catch problems like moisture buildup, pest activity, or shifting inventory before they escalate into bigger issues.
During each inspection, look for damp spots, discoloration, or musty odors on both the inflatables and their storage bags. Tools like a thermometer and hygrometer can help you monitor temperature and humidity levels. Also, scan the storage area for signs of pests, such as droppings, gnaw marks, or nests.
If you spot moisture or mold, remove the affected inflatable immediately. Dry it thoroughly in a warm, ventilated space and clean it with a mild disinfectant before returning it to storage. For pest-related issues, check for entry points in the storage area and consider traps or repellents to prevent further problems.
Keep a maintenance log to document each inspection. Note the date, any issues you find, and the steps you take to address them. This log ensures nothing gets overlooked and helps refine your storage practices over time. Regular checks like these protect your equipment, making sure your inflatables stay in great shape until spring.
Rotate Your Inventory
Another crucial step is rotating your inventory. This prevents prolonged pressure on specific areas of the material, which can cause compression marks, creases, or flat spots that might impact performance later.
To rotate effectively, shift the position of each unit within your storage area. For example, if you’re using shelves or pallets, alternate which inflatables are on top or bottom. Avoid keeping any one unit in the same spot for consecutive months.
Handle your inflatables carefully during this process to prevent tears or abrasions. Rotation also gives you a chance to inspect for any new damage or concerns that might have gone unnoticed during monthly checks.
Bouncy Rentals USA, a well-known party rental company, follows a detailed maintenance routine during winter. They conduct monthly inspections to check for moisture, pests, and shifting inventory. Their team rotates inflatables every four weeks, uses heavy-duty storage bags, and keeps meticulous maintenance logs. This approach has helped them maintain high-quality equipment and excellent customer satisfaction year-round.
Conclusion: Protect Your Inflatable Investment
Taking care of your inflatables during the off-season isn’t just about tidying them away – it’s about safeguarding an asset that can keep generating value for years to come. From thorough inspections to proper storage, every step outlined here works together to extend the life of your equipment.
Did you know that well-maintained inflatables can cut repair costs by as much as 30% annually? By keeping mold, mildew, and material wear at bay through proper storage techniques, you’re not just saving money – you’re protecting your bottom line.
Controlling storage conditions, like maintaining the right climate, prevents material from breaking down prematurely. And when inflatables are stored clean, dry, and damage-free, they’re ready to go as soon as the busy season rolls back around. No wasted time, no unnecessary stress.
Routine maintenance also ensures your inflatables stay reliable for every event. Regular inspections and rotating inventory help you avoid surprises like moisture damage, pests, or compression issues. These straightforward practices help preserve the quality and safety of your equipment, so it continues to bring joy and excitement to every occasion.
FAQs
What happens if inflatables are stored in a non-temperature-controlled environment during winter?
Storing inflatables in a non-temperature-controlled space during winter can lead to some serious problems. When exposed to extreme cold, the vinyl material can become brittle, making it more prone to cracks or tears. On top of that, fluctuating temperatures can create condensation. If the inflatables aren’t completely dry before storage, this moisture can lead to mold or mildew growth.
To keep your inflatables in good shape, store them in a dry, indoor area with consistent temperatures. This not only helps prevent damage but also ensures your equipment lasts longer and is ready to go when the warmer months roll around. If you’re renting inflatables from Bouncy Rentals USA, you can count on us to take every step necessary to keep our equipment in excellent condition all year.
What’s the best way to make sure my inflatables are completely dry before storing them for winter?
To get your inflatables ready for winter storage, begin by fully inflating them in a clean, dry space. Use a soft towel or a leaf blower to wipe away any visible moisture, paying extra attention to seams and crevices where water tends to hide. If you can, let them air-dry in a well-ventilated area for a few hours to ensure every bit of dampness is gone.
Storing inflatables while they’re even slightly damp can cause mold, mildew, or damage to the material. Once they’re completely dry, fold and roll them carefully to avoid creating creases. Keep them in a cool, dry spot to shield them from humidity and temperature changes.
How can I prevent mold and mildew when storing inflatables for winter?
To keep inflatables free from mold and mildew during winter storage, it’s crucial to ensure they are completely dry before packing them away. Moisture hiding in seams or crevices can lead to fungal growth, so take the time to inspect every corner for dampness. Give them a good cleaning with a mild soap solution, and then let them dry thoroughly before folding.
Store the inflatables in a cool, dry place – indoors is ideal – to protect them from extreme temperatures and humidity. Airtight storage bags or containers can add an extra layer of defense. To further reduce the risk of moisture buildup, toss in a few moisture-absorbing packets to help keep the area dry.