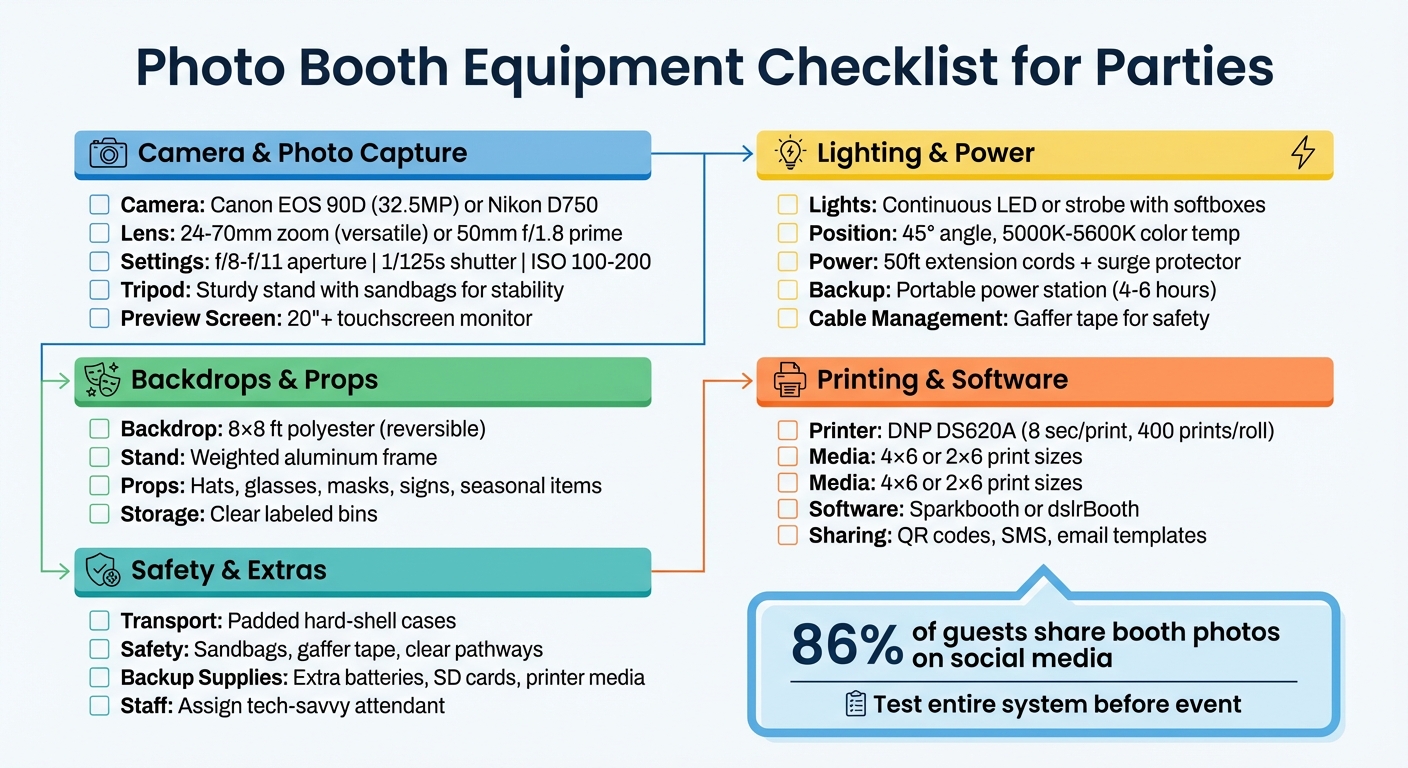
Photo booths are a hit at events, offering instant keepsakes and fun experiences for guests. Setting up a successful photo booth doesn’t have to be daunting – just follow a clear checklist. Here’s what you need:
- Camera and Lens: Use a DSLR or mirrorless camera like the Canon EOS 90D or Nikon D750, paired with a versatile 24–70mm lens for sharp, vibrant photos. Adjust settings to f/8–f/11 aperture, 1/125s shutter speed, and ISO 100–200 for best results.
- Lighting: Opt for continuous LED lights or strobes with softboxes to ensure flattering, even lighting. Position lights at a 45-degree angle for natural-looking photos.
- Backdrops and Props: Choose an 8×8 ft backdrop to fit groups, and stock up on fun props like hats, signs, and masks. Keep everything organized in labeled bins.
- Printing and Software: Use a dye-sublimation printer like the DNP DS620A for quick, smudge-free prints. Software like Sparkbooth or dslrBooth manages photo sequences, templates, and sharing options.
- Power and Safety: Bring extension cords, surge protectors, and portable power stations. Secure cables with gaffer tape and stabilize equipment with sandbags to prevent accidents.
- Transport and Setup: Use padded cases for your gear and scout the venue for loading zones and power outlets beforehand.
Test everything before the event, and have extras like batteries, SD cards, and printer supplies on hand. Assign an attendant to assist guests and troubleshoot issues. With this checklist, you’ll deliver a hassle-free, memorable photo booth experience.
Complete Photo Booth Equipment Checklist for Events
Camera and Photo Capture Equipment
The camera is the backbone of any photo booth. It’s what determines whether guests leave with crisp, vibrant memories or blurry disappointments. As David Hobrath, President of Clear Choice Photo Booth, explains:
"The camera is the core of any photo booth experience. It influences the sharpness of each photo, the accuracy of color, and the overall atmosphere your guests walk away remembering."
Camera and Lens
DSLR and mirrorless cameras are the go-to choices for professional-quality images. They shine in low-light settings typical of events, offer full manual control for perfect exposure, and produce sharp images suitable for printing. Canon cameras are highly recommended because they integrate seamlessly with popular photo booth software like dslrBooth and Sparkbooth.
For specific models, the Canon EOS 90D offers a 32.5-megapixel resolution and fast autofocus, while the Canon Rebel T7 is a more budget-friendly option that still delivers excellent image quality. If you prefer a mirrorless camera, the Canon R50 stands out with its compact design and quick eye-tracking autofocus. Another solid pick is the Nikon D750, which provides full-frame image quality.
The lens you choose is just as important as the camera. A 24–70mm zoom lens is versatile enough for both portraits and group shots, saving you from switching lenses mid-event. In tighter booth spaces, a 35mm lens works well, while a 50mm f/1.8 prime lens delivers unmatched sharpness when space allows .
For settings, use Manual Mode with these adjustments: aperture at f/8–f/11, shutter speed at 1/125s, and ISO between 100–200. This ensures a deep depth of field and noise-free images. Once the guest position is set, switch to manual focus to avoid delays during busy moments.
Tripod or Camera Stand
A sturdy tripod or camera stand is critical. Even minor movements can blur images, especially in the dim lighting common at events. A tripod keeps the camera steady and ensures consistent framing relative to the backdrop, minimizing the need for constant adjustments.
To secure your setup, fully spread the tripod legs and stabilize them with sandbags. Use gaffer tape to secure any cables and prevent accidental bumps. Position the stand at roughly head height for the best angle, and if the venue has uneven flooring – like historic buildings or outdoor spaces – opt for a tripod with adjustable legs to keep the camera level.
Photo Preview Device
A photo preview device adds an interactive element, letting guests see themselves before the photo is taken. A touchscreen monitor of at least 20 inches provides enough space for group previews. The screen should display a live view, include a countdown timer, and allow guests to initiate the photo sequence or choose templates . Mount the monitor on an adjustable stand to accommodate guests of different heights.
Larger touchscreen monitors can create a more immersive experience, though they often need to be tethered to a laptop for functionality . Regardless of the size, ensure the monitor is stable enough to handle the frequent use typical of high-energy events.
Once your camera and preview setup is ready, you’ll be prepared to move on to the next critical components: lighting and power equipment.
Lighting and Power Equipment
Once your camera and preview setup are ready, the next step is nailing your lighting and power setup. These elements can make or break your photo booth experience. As the team at 1021 Events says:
"The heart of a truly great photo booth isn’t the fancy camera or the cool backdrop – it’s the light. Soft, flattering light is your secret weapon."
Lighting Equipment
For consistent, high-quality results, continuous LED lighting is a great choice. LED panels, ring lights, and wands stay on all the time, ensuring the preview matches the final photo. A popular option is the RALENO LED 2-Pack, which has a 4.6-star rating from 1,928 Amazon reviews. Prices for beginner-friendly LED sets start around $48.99, while professional bi-color panels can go up to $254.99.
If you’re aiming for ultra-sharp images, strobe or flash lighting is the way to go. These lights emit quick bursts that freeze motion and overpower ambient light, making them perfect for both bright and dim environments. The AlienBees B400, priced at $244.95, is a solid choice. Keep in mind, though, that strobes require more setup and aren’t ideal for video.
To soften harsh light and eliminate unflattering shadows, light modifiers like softboxes and umbrellas are essential. The YICOE Softbox Kit, priced at approximately $79.99, has a 4.6-star rating from 2,074 Amazon reviews and offers excellent value. For the best results, position your main lights at a 45-degree angle to your subject and slightly above eye level. This setup adds dimension and reduces glare on glasses. Adjust the color temperature to 5000K–5600K for natural-looking skin tones.
Now that your lighting is set, let’s tackle the power requirements.
Power Supplies
A reliable power setup is just as important as good lighting. Start with heavy-duty 50-foot extension cords and a quality surge protector to handle distant outlets and prevent power surges. As 1021 Events puts it:
"A high‑quality surge protector and a bunch of extension cords in different lengths have saved me more times than I can count."
For outdoor events or venues with limited outlets, a portable power station is a lifesaver. The Jackery PowerBar, priced around $129.99 (77Wh/20,800mAh), can power your setup for 4 to 6 hours. For longer events, consider the Anker PowerHouse, which offers extended capacity at $499.
To keep your camera running without interruptions, use AC power adapters (also called DC couplers or "dummy batteries"). These provide continuous power and eliminate the need for mid-event battery changes. For example, the ACK-E10 AC Power Adapter for Canon DSLRs costs about $12.99.
Lastly, don’t overlook cable management. Secure all cords with gaffer or staging tape to prevent tripping hazards and accidental disconnections. Stabilize light stands with sandbags, especially for outdoor setups or uneven surfaces. Before the event, disable screensavers, power-saving modes, and automatic updates on your booth computer to avoid interruptions during use.
Backdrops, Props, and Display Items
Now that your lighting and power are sorted, it’s time to focus on the elements that make your photo booth stand out. As Stay Golden Photo Booth explains:
"A backdrop instantly creates the ambiance you want for your event. Whether it’s elegant, whimsical, or themed, the right backdrop sets the stage for memorable photos."
Let’s dive into how backdrops, props, and display options can bring your photo booth’s personality to life.
Backdrops and Stands
The backdrop is more than just decoration – it’s what transforms your booth into a photo-worthy space. For formal events, fabric backdrops made of muslin, cotton, or velvet offer a polished, non-reflective finish. Meanwhile, high-energy events often lean toward sequins, metallics, or custom-printed designs.
A durable 8×8-foot polyester backdrop is a great choice for accommodating groups and filling the frame. Many polyester options are reversible and wrinkle-resistant, but if wrinkles do appear, a handheld steamer or a low-heat iron can do the trick. Pair your backdrop with a sturdy aluminum stand that’s properly weighted or anchored, especially if you’re setting up outdoors or in busy areas. Quality stands come in a variety of price points, so you’ll find one that fits your budget.
Props and Accessories
Props are the secret ingredient that turns shy guests into photo booth superstars. Stock up on playful items like oversized glasses, silly hats, masquerade masks, fake mustaches, inflatable instruments, and handheld signs with fun messages. For corporate events, custom-branded props add a professional touch, while floral accents are perfect for weddings. Seasonal events? Think holiday-themed signs and accessories.
To keep things organized, store props in clear, labeled bins so guests can easily find what they need. Regularly clean and replace worn-out items to keep your display fresh and hygienic. For a modern twist, consider adding augmented reality filters or digital stickers – these tech-savvy options are a hit with younger crowds.
Photo Display Options
Once your backdrop and props are ready, it’s time to think about how guests will enjoy their photos. Offer instant 4×6 or 2×6 prints as take-home keepsakes, and consider adding custom frames or magnets for an extra touch. For digital sharing, display a QR code on the booth screen so guests can download their photos directly to their smartphones.
To keep the energy high, set up a live TV feed showing photos as they’re taken – this not only entertains but encourages more participation. Another fun idea is a visual guestbook station where guests leave behind a print along with a handwritten note, creating a meaningful keepsake for the host. If you’re looking to capture guest data, integrate an email opt-in feature into the display flow – these features have seen opt-in rates as high as 80%.
Position your booth and display screens in high-traffic areas, like near the entrance or the dance floor, to ensure maximum engagement.
Printing Equipment and Software
Once your backdrops and props are ready to impress, it’s time to focus on the technical essentials of your photo booth: the printing equipment and software that transform moments into lasting memories.
Photo Printer and Media
When it comes to photo booths, dye-sublimation printers are the go-to choice. As Mirrored Memories NJ explains:
"Dye-sublimation printers are the gold standard because they’re fast, reliable, and deliver vibrant, smudge-free photos."
Speed is key for events with lots of guests. The DNP DS620A is a standout, producing a 4×6 print in just 8 seconds and holding up to 400 prints per roll – perfect for high-demand settings. For a more budget-friendly option, the HiTi P525L prints the same size in about 12 seconds and offers lower media costs. If portability is a priority, the compact DNP QW410 is easy to transport while still delivering high-quality prints.
Your media kit should include matching paper rolls and thermal ribbons – mixing supplies from different packs can lead to issues. Stock up on popular print sizes like 4×6 photos for keepsakes or 2×6 strips for the classic photo booth experience . To avoid disruptions during the event, always bring at least one extra set of media supplies .
Photo Booth Software
The software is the control center of your photo booth, managing everything from camera countdowns and touchscreen interactions to custom print designs and instant sharing via SMS, email, or QR codes. Popular software options include Sparkbooth, dslrBooth, LumaBooth, and Darkroom Booth.
Pre-load SMS and email templates with event-specific hashtags or thank-you notes to add a personal touch and boost the event’s branding. After the event wraps up, make sure those memories are safely stored and creatively showcased.
Storage and Scrapbooking
Digital backups are a must. Save all event photos on USB drives or cloud storage to ensure the host has access to every shot. While digital sharing is convenient, physical prints remain a favorite, offering guests a tangible keepsake they can take home.
For an added touch, set up a scrapbook station where guests can paste duplicate prints and leave handwritten notes. Provide adhesive and pens to make it easy for guests to participate. The result? A heartfelt keepsake that will be cherished long after the event.
Transport, Setup, and Safety
Getting your equipment to and from events safely, setting it up efficiently, and prioritizing safety measures can make all the difference in ensuring a smooth experience.
Transport and Storage
The first step to protecting your gear starts with investing in the right cases. David Hobrath, President of Clear Choice Photo Booth, advises:
Secure equipment in custom hard-shell cases to prevent transit damage.
Hard-shell cases with thick padding, wheels, and handles are perfect for safeguarding delicate items like cameras and printers. For added protection, consider using custom-cut foam inserts.
Keeping everything organized is just as important. Labeling each case can save time during unloading, and packing your vehicle in a methodical way ensures fragile items stay secure. Before the event, scout the venue to identify key areas like loading zones, freight elevators, and power outlets. This extra preparation can help avoid last-minute stress. Opting for lightweight and foldable equipment when possible can also make transport and setup much easier.
Once your gear is safely on-site, it’s time to focus on safety during setup.
Safety Precautions
After unloading, cable management should be your next priority. As 1021 Events highlights:
Tidy up your cables. Run them neatly along the floor and use gaffer tape to secure them down. This isn’t just about looking professional; it’s about preventing a serious tripping hazard.
Use gaffer tape to secure cables neatly along the floor, reducing the risk of trips or accidental disconnections. It’s also helpful for keeping power plugs firmly in place throughout the event.
Stability is another key consideration. Sandbags can be placed at the base of backdrop stands to prevent tipping, especially in busy or outdoor areas. Spread tripod legs wide for a sturdy base, and always keep a surge protector and extra extension cords ready. Lastly, make sure your setup is accessible for wheelchair users and leaves clear pathways for all guests. These small adjustments can help ensure everyone feels welcome and safe.
Conclusion and Final Tips
Having a solid checklist in place makes setting up a photo booth much easier. The key elements include reliable camera gear, consistent lighting, durable backdrops, intuitive software, and essential safety precautions. Together, these components ensure crisp photos and a seamless experience for guests.
Before the event, test the entire system by walking through the guest experience – from tapping the screen to printing and sharing photos digitally. This helps identify and fix any potential issues ahead of time. As the team at 1021 Events wisely notes:
A little organization upfront is the secret to a flawless experience from start to finish.
Be prepared for the unexpected by keeping extras on hand: spare camera batteries, SD cards, printer supplies, and even a portable Wi-Fi hotspot. Make sure there’s always an extra set of printer paper and ribbon nearby during the event to avoid interruptions.
Once the technical side is under control, shift your focus to guest engagement. Assign a tech-savvy attendant to handle props, resolve minor issues, and encourage participation – especially for guests who might be hesitant. With 86% of guests likely to share booth photos on social media, you’re not just providing prints; you’re helping create lasting digital memories that go far beyond the event itself.
FAQs
How much space does a photo booth need?
When setting up a photo booth, you’ll generally need at least 8×8 feet of space for a standard setup. If you’re working with larger setups, like 360 video booths, plan for a bit more – around 10×10 feet or more. Don’t forget to leave extra room for guests, props, and equipment so everyone can move around comfortably and safely.
Do I need Wi-Fi for sharing photos?
While Wi-Fi can enhance the experience, it’s not always necessary for sharing photos from a photo booth. Many modern photo booths are designed to work offline, allowing you to capture and print images directly on-site. However, if Wi-Fi is available, it opens up options for instant sharing and access to features that rely on cloud connectivity. Make sure to review your photo booth’s specific features ahead of your event to understand its capabilities.
How many prints should I plan for?
Plan for 2 to 4 photo prints per guest to make sure everyone leaves with a memorable keepsake. The exact number can vary based on the size of your event and the preferences of your guests, so take your guest list and any unique requirements into account when deciding.